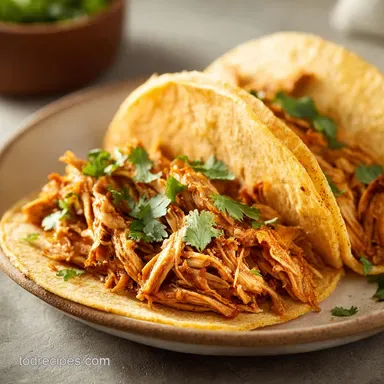
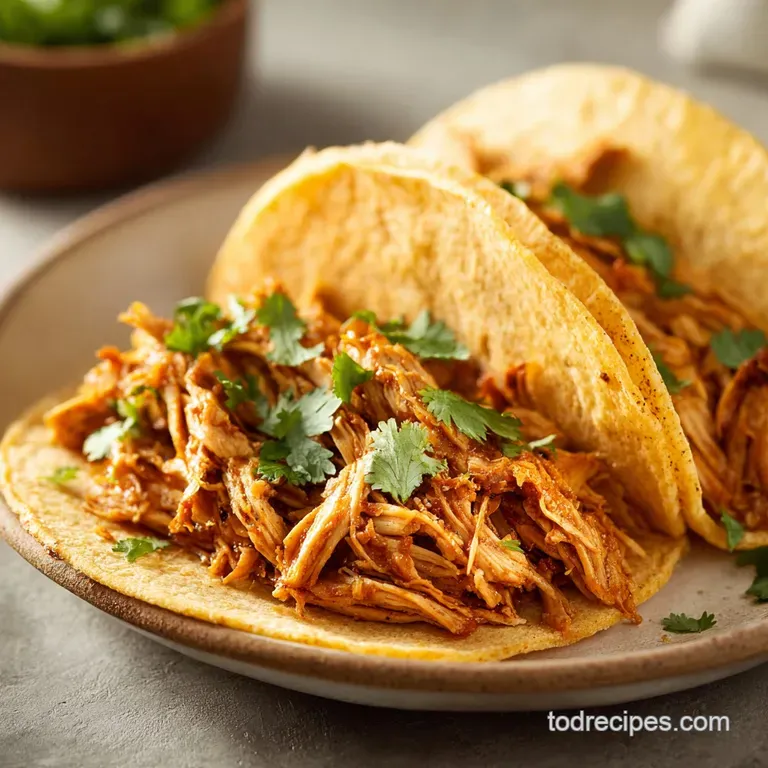
Instant Pot Chicken Carnitas Tacos: Healthy and Crispy

- Time: 10 min active + 60 min cook = Total 70 mins
- Flavor/Texture Hook: Tangy citrus braise with mahogany crisped edges
- Perfect for: Busy weeknights or meal prep for a crowd
- Instant Pot Chicken Carnitas Tacos Guide
- Why These Tacos Work
- Ingredient Deep Dive
- Essential Pantry Ingredients
- Step-by-Step Cooking Guide
- Common Mistakes and Fixes
- Troubleshooting Common Issues
- Adjusting Your Batch Size
- Busting Kitchen Myths
- Storage and Leftover Tips
- Plating and Serving Ideas
- Recipe FAQs
- 📝 Recipe Card
That first sizzle when the chicken thighs hit the hot oil is where the magic starts. I remember the first time I tried making "shortcut" carnitas using chicken breasts, and it was a disaster. The meat was dry, tasteless, and felt more like cardboard than a taco filling.
I realized that if you want that authentic, melt in-your mouth feel, you have to embrace the fat of the thigh.
Once those thighs brown, the kitchen fills with this heavy, earthy aroma of toasted cumin and smoked paprika that honestly makes you want to eat the meat right then and there. But the real win is the citrus.
When the orange and lime juices hit the pot, they strip away all those flavorful brown bits from the bottom and create a velvety sauce that sinks deep into the protein.
You can expect a meal that feels like it took all day but actually fits into a tight schedule. These instant pot chicken carnitas tacos are designed for anyone who wants big, bold flavors without spending eight hours hovering over a stove.
It's all about the contrast between the tender, juicy interior and the shatter crisp exterior we get from the broiler.
Instant Pot Chicken Carnitas Tacos Guide
When I first started experimenting with this, I was obsessed with getting the texture right. Traditionally, carnitas are pork, and they take forever to render. By switching to chicken thighs, we get that same richness but in a fraction of the time. The key is not to skip the searing phase.
If you just throw everything in the pot and press start, you lose that deep, savory base. Searing creates a crust that anchors the spices, which then infuses the meat during the pressure cycle.
Most people are scared of the "Burn" notice on their pressure cooker, but that's why deglazing is so important. When you pour in that orange juice, you're not just adding liquid, you're lifting the "fond" - those caramelized protein bits - off the bottom. That is where the soul of the dish lives.
If you leave them stuck, you get an error code. If you scrape them up, you get a rich, complex sauce that tastes like it's been simmering for a decade.
The final step is the broil, and trust me, don't skip it. Pressure cooking makes meat tender, but it doesn't make it crispy. By spreading the shredded meat on a sheet pan and hitting it with high heat, you create those dark, caramelized edges.
It transforms the dish from a simple shredded chicken taco into something that feels like a restaurant copycat. It's the difference between "okay" and "I need another three of these."
Why These Tacos Work
Instead of getting bogged down in textbook terms, let's just look at what's actually happening in your pot.
- Acid Breakdown: The citric acid from the lime and orange juice helps break down the tougher connective tissues in the chicken thighs. This is why the meat pulls apart so easily without needing a knife.
- Pressure Infusion: Because the pot is sealed, the seasoning is forced into the meat under high pressure. You don't just have flavor on the outside, the chicken is seasoned all the way through.
- Fat Rendering: Chicken thighs have enough intramuscular fat to stay juicy during the over high heat pressure phase. This fat then carries the fat soluble flavors of the cumin and paprika deeper into the protein.
- Surface Caramelization: When we broil the meat at the end, we're evaporating the remaining moisture from the surface. This creates a concentrated layer of sugars and proteins that crisp up and turn dark brown.
According to Serious Eats, the way you manage moisture during a braise determines the final mouthfeel. In this recipe, we use a controlled amount of liquid so the chicken is submerged enough to cook but not so much that it becomes a soup.
| Method | Time | Texture | Best For |
|---|---|---|---|
| Slow Cooker | 6-8 hours | Very Soft | Set and forget mornings |
| Instant Pot | 70 mins | Tender/Crispy | Quick weeknight dinners |
| Oven Braise | 3 hours | Consistent | Large batches for parties |
| Stovetop | 2 hours | Rustic | Small portions, high control |
Ingredient Deep Dive
Not all ingredients are created equal here. Some are just for bulk, while others are doing the heavy lifting for the flavor profile.
| Ingredient | Science Role | Pro Secret |
|---|---|---|
| Chicken Thighs | Protein Base | Always use boneless/skinless for faster, even shredding |
| Orange Juice | Sugar/Acid | Provides the sweetness that caramelizes during the broil |
| Smoked Paprika | Color/Depth | Adds a "fire roasted" taste without needing a grill |
| Lime Juice | Brightness | Cuts through the fat of the thighs to balance the palate |
Essential Pantry Ingredients
Right then, let's get your counter ready. Make sure your citrus is fresh - the bottled stuff often has preservatives that change the acidity level and can make the sauce taste metallic.
- 2 lbs boneless skinless chicken thighs Why this? Higher fat content prevents drying out under pressure
- 1 tbsp olive oil Why this? High smoke point for searing the meat
- 1 tsp ground cumin Why this? Earthy base note essential for Mexican profiles
- 1 tsp chili powder Why this? Adds a mild heat and reddish hue
- 1 tsp dried oregano Why this? Adds a floral, herbal contrast to the heavy spices
- 1/2 tsp smoked paprika Why this? Mimics the flavor of a traditional charcoal pit
- 1 tsp kosher salt Why this? Coarser grains allow for better control over seasoning
- 1/2 tsp black pepper Why this? Basic sharp heat to wake up the other spices
- 1/2 cup fresh orange juice Why this? Natural sugars for the mahogany glaze
- 1/4 cup fresh lime juice Why this? Sharp acid to brighten the heavy proteins
- 4 cloves garlic, minced Why this? Aromatic punch that deepens during the braise
- 1 bay leaf Why this? Subtle bitterness that rounds out the citrus
- 14 small corn tortillas Why this? Authentic flavor and better structural support for juicy meat
- 1/2 cup diced white onion Why this? Sharp, raw crunch to contrast the soft meat
- 1/2 cup chopped fresh cilantro Why this? Fresh, peppery finish
- 1 lime, cut into wedges Why this? A final squeeze of acid right before eating
If you're looking for other ways to use chicken in your meal prep, you might enjoy my Baked Chicken Tenders recipe, which uses a different approach to get that crunch.
| Original Ingredient | Substitute | Why It Works |
|---|---|---|
| Orange Juice (1/2 cup) | Apple Juice (1/2 cup) | Similar sweetness. Note: Lacks the citrus zing, tastes slightly more "autumnal" |
| Corn Tortillas | Flour Tortillas | Softer and larger. Note: Less authentic flavor and can get soggy faster |
| Smoked Paprika | Regular Paprika | Adds color. Note: Loses the wood fired aroma; add a drop of liquid smoke to compensate |
| Fresh Garlic | Garlic Powder (1 tsp) | Consistent flavor. Note: Less pungent and aromatic than fresh cloves |
Step-by-step Cooking Guide
Let's crack on. Grab your Instant Pot and follow these steps closely. Pay attention to the visual cues - they're more important than the timer.
Phase 1: Searing and Seasoning
- Press the Sauté button on the Instant Pot. Add olive oil and brown the chicken thighs for 3-4 minutes per side until golden and sizzling. Note: Don't crowd the pot or the meat will steam instead of sear.
- Stir in the ground cumin, chili powder, dried oregano, smoked paprika, kosher salt, black pepper, and minced garlic. Stir for 60 seconds until the spices smell toasted and fragrant.
Phase 2: The Pressure Braise
- Deglaze the pot by pouring in the orange and lime juices. Use a wooden spoon to scrape the bottom thoroughly until no brown bits remain stuck to the metal. Add the bay leaf. Note: This prevents the dreaded Burn notice.
- Lock the lid and set to Manual/Pressure Cook on High for 20 minutes. Allow a 10 minute natural release before venting remaining steam. Wait until the pin drops before opening.
Phase 3: The Crisp and Finish
- Transfer chicken to a sheet pan and shred using two forks. Drizzle a small amount of the cooking liquid over the meat until it looks moist but not swimming in sauce.
- Set oven to Broil. Place the pan on the top rack and broil for 3-5 minutes until edges are mahogany colored and crispy. Note: Watch it like a hawk; it can go from charred to burnt in 30 seconds.
- Assemble the shredded chicken into corn tortillas and top with diced white onion, fresh cilantro, and lime wedges.
Common Mistakes and Fixes
Even for experienced cooks, things can go sideways. Usually, it's a small technical slip that ruins the texture.
Troubleshooting Common Issues
| Issue | Solution |
|---|---|
| Why Your Chicken Is Dry | This usually happens if you use chicken breasts instead of thighs. Breasts lack the fat needed to survive the pressure cooker, resulting in a stringy, dry texture. If you must use breasts, reduce the |
| Why Your Pot Triggered "Burn" | If you see the Burn notice, it's because those caramelized bits (the fond) were too thick on the bottom. You didn't deglaze thoroughly enough. Cancel the cycle, add a splash more juice, and scrape the |
| Why Your Meat Isn't Crispy | If the chicken is soft after the broiler, you probably added too much cooking liquid before the oven phase. The meat needs to be moist, but if it's swimming, the water will boil instead of crisping. D |
Quick Check for Success:
- ✓ Deglazed the pot completely after searing.
- ✓ Used boneless skinless chicken thighs.
- ✓ Allowed the 10 minute natural release period.
- ✓ Broiled on the top rack for maximum char.
- ✓ Warmed the corn tortillas before assembling.
Adjusting Your Batch Size
Whether you're feeding a solo craving or a crowd, you can scale this. But don't just double everything blindly, or the liquids will get out of balance.
Scaling Down
For a half batch (1 lb of chicken), use a smaller pan for broiling. Reduce the pressure cooking time by about 2-3 minutes. Be careful with the salt - start with 3/4 tsp and taste the final sauce before adding more.
Scaling Up
If you're doubling the recipe for a party, work in batches for the searing phase. If you crowd 4 lbs of chicken in one pot, they'll release too much water and won't brown. For the spices, only increase them to 1.5x instead of 2x - flavors like cumin can become overpowering in large volumes.
Reduce the total liquid by about 10% to ensure the sauce thickens properly.
| Goal | Action | Result |
|---|---|---|
| Extra Crunch | Broil for 6-7 mins | More charred edges, drier meat |
| Juicier Meat | Add 1/4 cup more broth | More velvety texture, less char |
| Spicy Kick | Add 1 tbsp chipotle in adobo | Smokey, pungent heat |
Busting Kitchen Myths
There are a few things people tell you about carnitas that just aren't true.
"Searing seals in the juices." This is a classic myth. Searing doesn't create a waterproof barrier; in fact, meat loses more moisture during the searing process. However, we do it for the flavor. The browning creates complex savory notes that you simply cannot get from boiling or steaming.
"Pressure cooking makes meat tough." Actually, it's the opposite. Pressure cooking is one of the fastest ways to break down collagen. The only time it makes meat tough is if you "Quick Release" the steam instantly. That causes the muscle fibers to contract violently, squeezing out the moisture.
The natural release is the real secret.
Storage and Leftover Tips
These tacos are great fresh, but the leftovers can be even better if you handle them right.
In the Fridge: Store the shredded, broiled chicken in an airtight container for up to 4 days. Keep your toppings (onion, cilantro, lime) in separate containers so they stay crisp.
In the Freezer: You can freeze the cooked, shredded chicken for up to 3 months. Let it cool completely before freezing. When you're ready to eat, thaw it in the fridge overnight.
The Best Reheating Method: Don't use the microwave - it will make the meat rubbery. Instead, toss the chicken in a hot skillet with a tiny bit of oil for 3-4 minutes. This brings back the crispy edges and warms the meat through without drying it out.
For a side that complements the richness of these tacos, my Sourdough Sandwich Bread makes a great base for a side garlic toast, though traditional corn tortillas are the way to go here.
Zero Waste Tip: Don't throw away the leftover braising liquid! Strain it and use it as a base for a Mexican style soup or drizzle it over some cilantro lime rice. If you have leftover onion and cilantro, mix them with a bit of lime juice and salt to make a quick relish for the next day's lunch.
Plating and Serving Ideas
Presentation is everything when you're trying to impress friends. Don't just pile the meat in a shell; build the taco with intention.
The Street Taco Style
Use the smallest corn tortillas you can find. Double them up (two tortillas per taco) to prevent leaking. Place a generous heap of chicken in the center, then sprinkle the white onion and cilantro in a line across the top. Serve with lime wedges on the side so guests can add their own hit of acidity.
The Loaded Platter
If you're serving a group, put a big pile of the broiled chicken in the center of a platter. Surround it with warm tortillas, bowls of diced onion, cilantro, and perhaps some sliced radishes or avocado. This lets everyone customize their tacos and looks far more impressive than individual plates.
The Taco Bowl Twist
For those avoiding tortillas, serve the chicken over a bed of shredded cabbage or romaine lettuce. Add black beans, corn, and a dollop of sour cream. The mahogany colored chicken looks stunning against the bright greens of the salad, making it a great healthy option that doesn't sacrifice the flavor of the instant pot chicken carnitas tacos.
Recipe FAQs
Can I use chicken breasts instead of thighs?
No, stick with thighs. Breast meat dries out quickly under pressure and lacks the fat necessary to achieve those mahogany, crispy edges during broiling. For a different tender result, try our salsa verde chicken.
How to get the chicken crispy?
Broil on the top rack for 3-5 minutes. Spread the shredded meat on a sheet pan and drizzle with a small amount of cooking liquid before placing it under the broiler.
Is it true I can skip the sauté step without affecting the flavor?
No, this is a common misconception. Sautéing the chicken for 3-4 minutes per side creates a deep, savory base that pressure cooking alone cannot replicate.
How to store leftovers?
Keep shredded chicken in an airtight container. It lasts up to 4 days in the fridge or 3 months in the freezer, provided you store the onion and cilantro separately.
Can I use bottled orange or lime juice?
No, use fresh citrus. Bottled versions often have a metallic aftertaste and lack the bright acidity needed to balance the smoked paprika and cumin.
Why is my chicken too tough to shred?
You likely skipped the natural release. Allowing the pot to sit for 10 minutes before venting prevents the meat from tightening up and becoming rubbery.
How to avoid the "burn" notice in the Instant Pot?
Deglaze the bottom thoroughly. Pour in the juices and scrape all the browned bits off the floor of the pot before locking the lid to ensure even heat distribution.
Instant Pot Chicken Carnitas