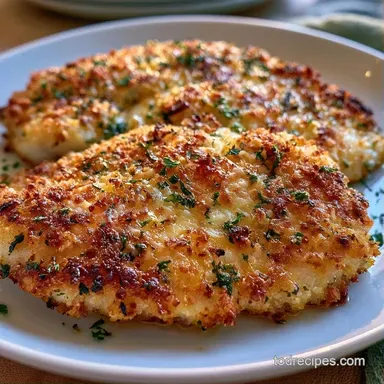
Golden-Crisp Panko Crusted Baked Tilapia
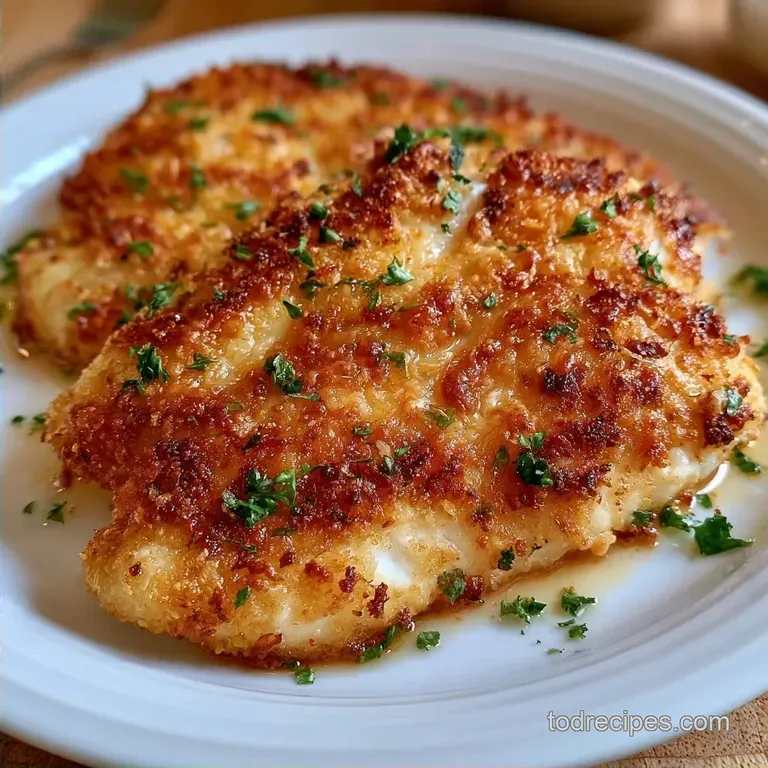
- Time: 5 min active + 20 min baking
- Flavor/Texture Hook: Golden, crunchy exterior with flaky, tender fish
- Perfect for: Fast weeknight dinners or budget-friendly meal prep
- Panko Crusted Baked Tilapia Recipe
- The Truth About Fish Crusts
- Quick Specs and Timing
- What Each Ingredient Does
- Tools for the Job
- Step by Step Cooking
- Fixing Common Crust Issues
- Troubleshooting Common Issues
- Swaps and Variations
- How to Store and Keep Fresh
- Pairing Ideas
- Quick Scaling Guide
- Common Kitchen Myths
- Recipe FAQs
- 📝 Recipe Card
Panko Crusted Baked Tilapia Recipe
That first bite is everything. You get the loud, satisfying crunch of toasted panko, then the salty tang of Parmesan, and finally the fish that just flakes apart. My kitchen always smells like a seafood bistro when this is in the oven, especially with the smoked paprika hitting the heat.
I used to struggle with baked fish coming out either rubbery or a soggy bottom. I tried every breading method in the book until I realized the mistake was the pan. Once I started using a wire rack, everything changed.
This Panko Crusted Baked Tilapia is my go to when I want something that feels like a steakhouse meal but only costs a few bucks per serving. It's straightforward and doesn't require any fancy equipment.
The Truth About Fish Crusts
The biggest lie in home cooking is that you need to deep fry fish to get a real crunch. Baking at a high temperature does the job just as well, provided you have the right fat content in your breading.
Panko is a Japanese style crumb that's larger and airier than standard breadcrumbs, which means it doesn't soak up as much oil and stays crispier.
Many people skip the butter in the crumb mixture, thinking the fish provides enough moisture. Don't do that. Adding a bit of melted butter directly to the panko ensures every single crumb browns evenly in the oven. Without it, you get pale patches that feel like wet cardboard.
The binding layer is where most people go wrong. Flour and egg are classic, but they can create a gummy layer between the fish and the crust. Mayo creates a fat based seal. This keeps the juices inside the fish and gives the panko something heavy to cling to, so the crust doesn't slide off when you lift the fillet.
Quick Specs and Timing
When you're rushing through a Tuesday night dinner, every minute counts. This recipe is designed to be fast. Since tilapia is a lean, thin fillet, it doesn't need an hour in the oven. Overcooking it is the fastest way to ruin the meal.
| Metric | Target | Note |
|---|---|---|
| Oven Temp | 400°F (200°C) | High heat for browning |
| Cook Time | 15-20 minutes | Watch for opacity |
| Internal Temp | 145°F (63°C) | See FoodSafety.gov |
The wire rack is the real MVP here. It lets the hot air hit the bottom of the fish, meaning you don't have to flip the fillets halfway through. That saves time and prevents the crust from cracking.
What Each Ingredient Does
I've tried making this with just breadcrumbs, and it's not the same. The combination of Parmesan and panko creates a salty, nutty layer that complements the mild flavor of the tilapia.
Mayo and Mustard: These act as the glue and the flavor base. The acidity in the Dijon cuts through the richness of the mayo and the butter.
Panko and Parmesan: Panko provides the structure, while the cheese adds a savory depth and helps the crust brown faster due to the proteins in the cheese.
| Ingredient | What It Does | Best Swap |
|---|---|---|
| Mayonnaise | Binds crust and adds moisture | Greek Yogurt (Tangier, less fat) |
| Panko Breadcrumbs | Creates a light, airy crunch | Crushed Cornflakes (Sturdier crunch) |
| Parmesan Cheese | Adds umami and golden color | Pecorino Romano (Saltier flavor) |
| Smoked Paprika | Adds color and woody aroma | Cumin (Earthier, taco style vibe) |
Tools for the Job
You don't need a professional kitchen for this, but a few specific items make it easier. A rimmed baking sheet is mandatory so you don't have oil dripping onto your oven floor.
The wire rack is the one tool I won't compromise on. If you don't have one, you can use parchment paper, but you'll have to flip the fish, which usually knocks the crust off. A simple cooling rack from the bakery section works perfectly.
For the breading, use a shallow dish or a plate. It gives you more room to press the fish down firmly. If you use a bowl, you'll end up with "bald spots" on your fillets because they can't lay flat against the crumbs.
Step by step Cooking
Right then, let's get into the actual process. Prep your station first so you aren't scrambling while the oven is heating up.
Preparing the Foundation
- Preheat your oven to 400°F (200°C). Line your baking sheet with parchment paper and place a wire rack on top to allow heat to circulate under the fish. Note: This prevents the bottom from getting soggy.
- In a small bowl, whisk together the mayonnaise, Dijon mustard, and lemon juice until smooth.
Constructing the Crust
- In a separate shallow dish, combine the panko, Parmesan, garlic powder, paprika, salt, and pepper.
- Stir in the melted butter until the crumbs are evenly coated. Note: The butter ensures a golden finish.
Coating the Fillets
- Brush a thin, even layer of the mayonnaise mixture over the top of each tilapia fillet.
- Press the coated side of each fillet firmly into the panko mixture, pushing the crumbs down to create a thick, uniform layer.
Achieving the Golden Finish
- Place the fillets on the prepared wire rack.
- Bake for 15–20 minutes until the fish is opaque, flakes easily with a fork, and the crust is deep golden brown.
Fixing Common Crust Issues
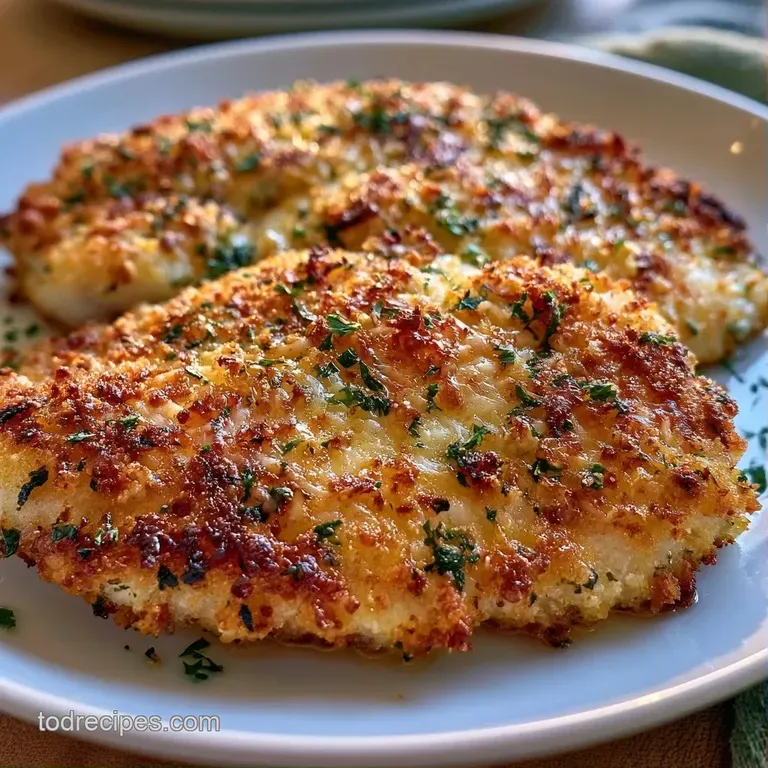
Even with a simple recipe, things can go sideways. Usually, it's a matter of moisture control. If your fish is too wet when it hits the mayo, the crust will slide right off.
Troubleshooting Common Issues
| Issue | Solution |
|---|---|
| Why Your Crust Is Soggy | If the panko isn't crunching, you probably didn't use a rack or you overcrowded the pan. When fillets are too close, they steam each other instead of roasting. |
| Why Your Crust Slips | This happens when the mayo layer is too thick or the fish wasn't patted dry. The mayo should be a thin glue, not a thick blanket. Use a paper towel to dry the tilapia before you start brushing. |
| Why Your Fish Is Dry | Overcooking is the culprit. Tilapia is thin and cooks fast. Start checking at 15 minutes. If it flakes with a fork, take it out immediately. |
Swaps and Variations
This Panko Crusted Baked Tilapia is a great canvas for different flavors. If you're bored of the classic version, you can tweak the crumbs easily.
Going gluten-free
Swap the panko for gluten-free breadcrumbs or almond meal. Almond meal makes the crust denser and nuttier, but it still browns well. If you use GF crumbs, add an extra teaspoon of butter since they tend to be drier.
Adding a Spicy Kick
Mix a teaspoon of cayenne pepper or crushed red pepper flakes into the panko. For an even bigger punch, swap the Dijon mustard for a spicy brown mustard or a swipe of Sriracha under the crumbs.
Using the Panko Crusted Tilapia Air Fryer Method
If you have an air fryer, this is even faster. Place the coated fillets in the basket and cook at 375°F for 10-12 minutes. You don't need a rack here since the air fryer is basically one giant convection oven. If you love this style, you might also like my Easy Crispy Baked Tilapia which uses a similar over high heat approach.
How to Store and Keep Fresh
Leftovers are fine, but the crust will lose its snap in the fridge. Tilapia stays good for about 3 days in an airtight container.
To reheat, avoid the microwave at all costs. Microwaving makes the breading rubbery and the fish mushy. Instead, pop them back in the oven at 350°F for 5-8 minutes or use a toaster oven. This brings back the crunch without overcooking the center.
For zero waste, don't throw away the leftover panko mixture. If it hasn't touched raw fish, you can store it in a jar in the fridge for 3 days. Use it as a topping for macaroni and cheese or sprinkle it over roasted vegetables for a bit of texture.
Pairing Ideas
Since the fish is mild and crunchy, you want sides that bring some brightness or creaminess to the plate.
The Classic Bistro Pair
Pair this with a lemon butter asparagus or a light quinoa salad. The acidity of the lemon in the sides cuts through the richness of the mayo and Parmesan. If you're looking for another fish option, my Baked Parmesan Crusted Tilapia is another great way to use cheese for a crust.
The Low Carb Comfort Pair
If you're watching carbs, skip the rice and go with roasted cauliflower or a garlicky sautéed spinach. The earthy flavor of the cauliflower matches the smoked paprika in the breading.
The Budget Family Pair
Serve the fish over a bed of fluffy white rice with a side of steamed peas. It's a filling, cheap meal that kids actually enjoy because the panko makes the fish taste like a fish stick, but better.
Quick Scaling Guide
Adjusting this for a crowd or a solo meal is simple, but don't just double everything blindly.
Scaling Down (1-2 fillets): Use a smaller baking sheet to keep the heat concentrated. You'll likely only need 1 tablespoon of mayo and 1/4 cup of panko. The cooking time stays roughly the same, but start checking at 12 minutes.
Scaling Up (8+ fillets): Work in batches. If you crowd the pan, the fillets will steam, and you'll lose the crunch. When doubling the panko mixture, only increase the salt and paprika by 1.5x. Spices can become overwhelming when scaled linearly.
Common Kitchen Myths
You might hear that you need to flour the fish before adding the binder. That's not true for this recipe. The mayo is thick enough to hold the panko on its own, and skipping the flour actually prevents a "skin" from forming, keeping the fish more tender.
Another myth is that frozen tilapia is inferior to fresh. Honestly, for a breaded recipe like this, frozen fillets are often better. They are usually flash frozen at peak freshness and hold their shape well during the breading process. Just make sure they are completely thawed and patted dry.
Recipe FAQs
How do you bake tilapia with panko crust?
Preheat your oven to 400°F. Brush fillets with a mixture of mayonnaise, Dijon, and lemon juice, press them into seasoned panko, and bake on a wire rack for 15 20 minutes.
How do I get the panko breadcrumbs to stick to the fish?
Brush a thin, even layer of the mayonnaise mixture over each fillet. This acts as a culinary glue, allowing the panko and Parmesan to adhere firmly when you press the crumbs down.
How long should I bake breaded tilapia in the oven?
Bake for 15 20 minutes. The fish is ready when the meat is opaque, flakes easily with a fork, and the crust has turned deep golden brown.
How can I ensure the crust stays crispy and doesn't get soggy?
Place the fillets on a wire rack set over a baking sheet. This allows hot air to circulate under the fish, preventing moisture from pooling and steaming the bottom of the crust.
How do I cook tilapia in the oven so it doesn't dry out?
Start checking for doneness at 15 minutes. Tilapia is a lean, thin fillet that cooks very rapidly; removing it the moment it flakes prevents the meat from becoming tough.
How do I prepare this recipe with a lemon butter flavor?
Whisk lemon juice into the mayo binder and stir melted butter into the panko. If you enjoyed mastering the flavor balance here, see how we use similar acid techniques in our homemade lemon curd.
Is it true that you must deep fry tilapia to get a crunchy crust?
No, this is a common misconception. By mixing melted butter into the panko and using a wire rack at 400°F, you achieve a fried like crunch without the oil.
Panko Crusted Baked Tilapia