No-Bake Rice Crispy Treats with Oreos Recipe
- Time: Active 10 mins, Passive 5 mins, Total 15 minutes
- Flavor/Texture Hook: Velvety marshmallow clouds meeting the dark, cocoa shatter of real cookies.
- Perfect for: School bake sales, midnight cravings, or an easy weekend project with kids.
- Master This No Bake Rice Crispy Treats with Oreos Recipe
- The Secret Physics of Marshmallow Tension
- Component Analysis of Your Treats
- Essentials for Your Cookie Creation
- Necessary Tools for the Job
- Step-by-Step Guide to Perfect Texture
- Common Pitfalls and Expert Fixes
- Scaling for Crowds or Cravings
- Plating Secrets and Serving Style
- Debunking Cereal Bar Myths
- Storing and Keeping Bars Fresh
- Variations for Every Season
- Recipe FAQs
- 📝 Recipe Card
Master This No Bake Rice Crispy Treats with Oreos Recipe
Picture this: the kitchen is quiet, the sun is just starting to dip, and you've got a sudden, nagging itch for something sweet that doesn't involve preheating the oven. I remember the first time I tried making these. I was convinced that simply tossing in some cookies would be enough. I was wrong.
My first batch was a crumbly mess because I didn't respect the butter to marshmallow ratio. It was a lesson learned the hard way, but that's how the best secrets are discovered, right?
Grandma always said the secret to a classic treat isn't just the sugar, it's the soul you put into the "squish." This No Bake Rice Crispy Treats with Oreos Recipe delivers a uniquely delicious twist on a classic favorite.
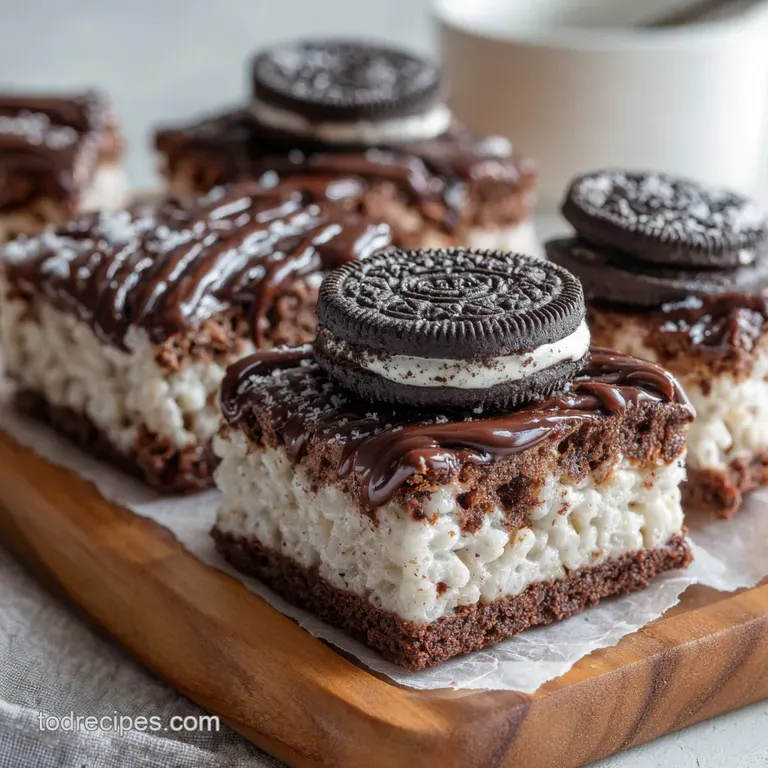
You get that nostalgic, crackling sound of the cereal meeting the molten marshmallows, but then bam! the deep, nostalgic aroma of dark cocoa cookies hits you. It’s a sensory overload in the best possible way.
We’re going for a texture that doesn't just sit there; it invites you to take another bite. We want a bar that has a slight "shatter" when you bite into the cookie chunks but remains silky and soft where the marshmallows have done their work.
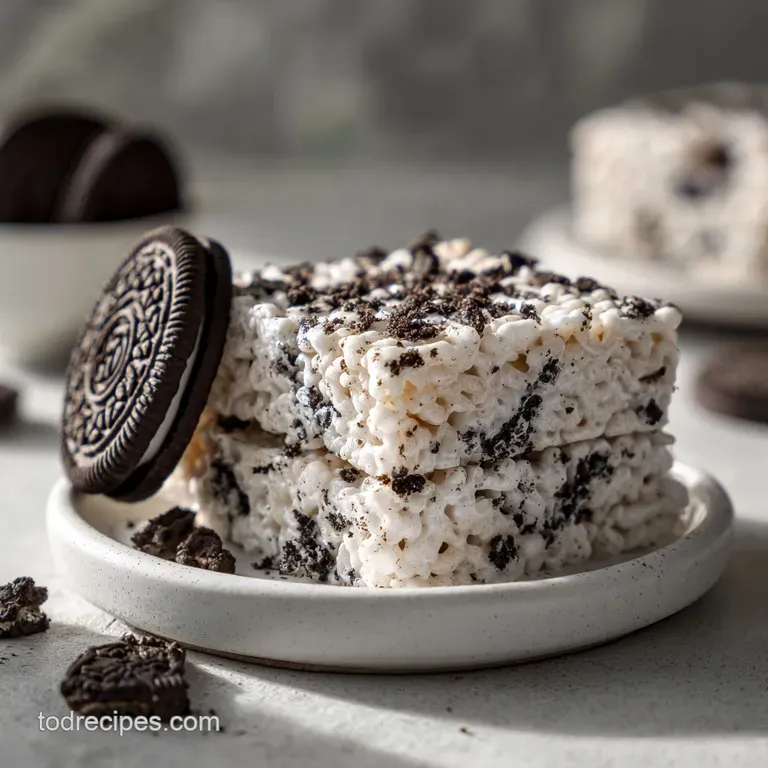
Trust me, once you see that white and black marbled effect in the pan, you'll never go back to the plain version. Let’s get stuck in and make something your neighbors will be begging for.
The Secret Physics of Marshmallow Tension
The Moisture Barrier: Coating the cereal in melted butter creates a fat based shield that prevents the sugar from turning the rice puffs soggy. Delayed Gelatinization: Reserving a portion of the marshmallows to fold in at the end ensures pockets of soft, stretchy pull that haven't been fully dissolved by heat.
| Comparison | Fast Method (Microwave) | Classic Method (Stovetop) |
|---|---|---|
| Texture | Softer, almost gooey | Chewy with a slight snap |
| Control | High risk of scorching sugar | Even melting and flavor depth |
| Effort | Low (3 minutes) | Medium (8 minutes) |
When you use the stovetop, you're allowing the butter to slightly brown, which adds a nutty undertone that offsets the intense sweetness of the white marshmallows. If you're in a rush, the microwave works, but you lose that complex flavor profile that makes people ask, "Wait, what did you put in these?" It's that tiny bit of extra effort that bridges the gap between a snack and a real dessert.
Component Analysis of Your Treats
| Component | Science Role | Pro Secret |
|---|---|---|
| Unsalted Butter | Fat emulsifier | Brown it slightly for a toasted toffee flavor note |
| Mini Marshmallows | Structural adhesive | Use fresh bags; old ones won't melt into a velvety silk |
| Rice Cereal | Aerated structure | Toast the dry cereal in a pan for 2 mins for extra crunch |
| Fine Sea Salt | Flavor enhancer | Never skip this; it cuts through the sugar to highlight the cocoa |
Since we are focusing on that classic American dessert feel, the quality of your butter matters. I always suggest a high fat European style butter if you can find it. The lower water content means your treats won't get "weepy" or soft the next day.
Similar to the logic in my Coffee Cake Gluten recipe, fat is the vehicle for flavor and the key to a lasting, moist crumb or in this case, a chewy bar.
Essentials for Your Cookie Creation
For this recipe, you need to be precise with your measurements to get that "bakery style" height. Here is what you need to grab from the pantry:
- Crispy Rice Cereal (6 cups / 160g): The blank canvas. Make sure it's fresh and crackly.
- Mini Marshmallows (10 oz / 285g): Divided into two piles one for melting, one for folding. Why this? The second pile creates those iconic "white clouds" in the bars.
- Unsalted Butter (1/2 cup / 115g): This is exactly one stick. Use unsalted so you can control the salt levels yourself.
- Oreo Cookies (26 Original): Roughly chopped into quarters. You want chunks, not dust.
- Pure Vanilla Extract (1 tsp): Real vanilla makes the marshmallow taste like expensive fudge.
- Fine Sea Salt (1/4 tsp): A tiny amount that makes the chocolate flavor pop.
- Oreo Cookies for Topping (2): Finely crushed until they look like dark sand.
If you are looking for a dairy-free swap, you can use a vegan butter block (not the tub kind) and vegan marshmallows. The texture will be slightly more "sticky" and less "creamy," but still very satisfying. For those who love a salty sweet combo, adding a spoonful of nut butter is a great trick, much like the filling in a Ruth Chris Sweet recipe.
Necessary Tools for the Job
You don't need much, but having the right "non stick" strategy is the difference between a fun afternoon and a sticky nightmare.
- Large Heavy Bottomed Pot: A 6 quart Dutch oven is my favorite. It holds the heat evenly so the marshmallows don't seize.
- 9x9 inch Square Pan: This size gives you those thick, chunky bars. If you use a 9x13, they will be thin and a bit sad.
- Silicone Spatula: This is non negotiable. Plastic or wood will hold onto the marshmallow glue and never let go.
- Parchment Paper: Don't just grease the pan. Line it with parchment so you can lift the entire block out for clean slicing.
Chef's Tip: Spray your silicone spatula with a little bit of non stick cooking oil before you start mixing. The marshmallow will slide right off like it's on ice.
step-by-step Guide to Perfect Texture
Right then, let's get to the fun part. Follow these steps closely, especially the cooling part patience is a virtue when you're waiting for sugar to set.
- Prep the Pan: Line your 9x9 inch pan with parchment paper, leaving an inch of overhang on the sides.
- Chop the Cookies: Take your 26 Oreos and chop them roughly. You want some pieces to be half a cookie and some to be smaller shards.
- Melt the Butter: In your large pot over low heat, melt the 1/2 cup of butter. Wait until it begins to sizzle and foam.
- Incorporate Marshmallows: Add about 8 oz of the marshmallows to the butter. Stir constantly until they are a velvety, smooth liquid.
- Add Aromatics: Stir in the vanilla extract and sea salt. Note: This ensures the flavor is evenly distributed throughout the "glue."
- The Big Mix: Remove the pot from the heat. Quickly dump in the 6 cups of cereal and the remaining 2 oz of mini marshmallows.
- Fold in Cookies: Gently fold the chopped Oreos into the mixture. Stir until the cereal is evenly coated and the cookies are marbled through.
- Press Gently: Transfer the mix to your prepared pan. Use the back of a buttered spoon to push it into the corners. Do not pack it down hard or the bars will be tough.
- The Topping: Sprinkle the 2 finely crushed Oreos over the top, pressing them in slightly so they stick.
- Set and Slice: Let the bars sit at room temperature for at least 30 minutes until firm to the touch and easy to lift.
Common Pitfalls and Expert Fixes
Even with a simple recipe, things can go sideways. The most common issue I see is people being too aggressive with the packing. If you press down like you're trying to flatten a tire, you'll crush all those air pockets in the cereal, and your bars will turn into bricks.
Why Your Treats Are Too Hard
The main culprit here is heat. If you boil the marshmallows or cook them on high heat, you're essentially making hard candy. Low and slow is the mantra for a soft bite.
| Problem | Root Cause | Solution |
|---|---|---|
| Bars are rock hard | Overheated marshmallows | Melt on the lowest heat possible and remove immediately |
| Soggy cereal | Old marshmallows or high humidity | Use a fresh bag and store in a cool, dry place |
| Treats won't stick | Not enough marshmallow | Ensure you're using the full 10 oz by weight |
Common Mistakes Checklist
- ✓ Using old marshmallows (they lose their moisture and won't melt properly)
- ✓ Packing the mixture into the pan too tightly (this destroys the airy texture)
- ✓ Slicing the bars while they are still warm (they will deform and lose their shape)
- ✓ Skipping the salt (it makes the chocolate taste flat without it)
- ✓ Using a pot that is too small (you need room to fold without crushing the cereal)
Scaling for Crowds or Cravings
If you're making these for a big party, you'll want to double the recipe. Use a 9x13 inch pan and double everything exactly. Just keep in mind that mixing 12 cups of cereal requires a very large pot think stockpot size.
When scaling down (for a small "just for me" batch), you can halve the recipe easily and use a loaf pan. For a smaller batch, the cooling time is usually faster, about 15 minutes. Just remember that with smaller amounts, the butter can brown much faster, so watch that pot like a hawk.
Plating Secrets and Serving Style
How you present these depends on who's eating them. If it's just the kids after school, a pile on a plate is fine. But if you're bringing these to a dinner party, you can really make them look professional.
| Plating Level | Technique | Visual Appeal |
|---|---|---|
| Simple | Rustic squares stacked high | Casual and inviting |
| Polished | Clean, 2 inch cubes with a white chocolate drizzle | Sophisticated and tidy |
| Restaurant | Circular cut outs topped with an Oreo half and sea salt | High end and intentional |
For a "restaurant" feel, I like to use a round biscuit cutter. It leaves a bit of "scrap" behind (which is the chef's snack, obviously), but the round shape looks so much more elegant on a white plate. If you want to go even further, a small dollop of whipped cream on the side with a few fresh berries can balance the richness. If you're a fan of bite sized desserts, you might also love this Recipe for Mini cheesecakes which uses a similar "crush and set" logic for the base.
Debunking Cereal Bar Myths
One big myth is that you have to refrigerate these to get them to set. Actually, the fridge is the enemy of the rice crispy treat. Cold air dries out the marshmallows and makes the cereal go stale faster. Always set them at room temperature.
Another misconception is that the "brand name" cereal is the only way to go. While some generic brands are a bit softer, most store brand crispy rice cereals work perfectly fine. The real flavor comes from the butter and the vanilla, so don't feel like you have to break the bank on the cereal box.
Storing and Keeping Bars Fresh
To keep these treats at their peak, store them in an airtight container at room temperature. They will stay soft and chewy for up to 3 days. If you need to stack them, put a piece of parchment or wax paper between the layers so they don't fuse into one giant mega bar.
Zero Waste Tip: If you find yourself with a few "butt ends" or crumbs from the bottom of the pan, don't throw them away. Crush them up and use them as a topping for vanilla ice cream. It's like a deconstructed cookie marshmallow sundae. You can also freeze the bars!
Wrap individual squares tightly in plastic wrap and then put them in a freezer bag. They stay good for 2 months. Just let them thaw on the counter for 20 minutes before you dive in.
Variations for Every Season
The beauty of this No Bake Rice Crispy Treats with Oreos Recipe is how easily it adapts to different flavors. You can swap the original cookies for Golden Oreos if you want a "birthday cake" vibe, or use the mint filled ones for a refreshing holiday treat.
1. Halloween Oreo Rice Krispie treats
Use the Oreos with the orange filling! You can also add a few drops of orange food coloring to the melted marshmallows before adding the cereal for a vibrant, spooky look.
2. Peanut butter Oreo Rice Krispie treats
Stir in 1/4 cup of creamy peanut butter into the melted marshmallow mixture. The combination of peanut butter and chocolate cookies is a classic for a reason it’s rich, salty, and totally addictive.
3. Birthday cake oreo rice krispie treats
Use the Birthday Cake flavored cookies and add 2 tablespoons of rainbow sprinkles to the mix. It turns a standard snack into a party ready dessert in seconds.
4. dairy-free/Vegan Option
Use a plant based butter and vegan marshmallows (like Dandies). Most Oreo cookies are actually "accidentally vegan," but always check the label to be sure. This version is just as delicious and ensures everyone at the table can have a piece.

Recipe FAQs
Can I use a different brand of crispy rice cereal?
Yes, most store brand cereals work well. The primary flavor comes from the butter and Oreos, so focus on ensuring your cereal is fresh and crackly.
How to prevent the finished treats from becoming rock hard?
Melt marshmallows over low heat only. Overheating the sugar is the main cause of hardness; remove the mixture from the heat as soon as it becomes a smooth liquid.
Is it true that I must use a 9x9 inch pan for the correct thickness?
No, this is a common misconception. While a 9x9 inch pan yields the ideal thick bar, a 9x13 inch pan will work if you double the recipe volume.
How to ensure the bars are chewy and not dense bricks?
Press the mixture gently into the pan using a buttered spatula. Do not pack it down tightly, as this crushes the air pockets created by the cereal.
Can these treats be stored in the refrigerator for freshness?
No, refrigeration is not recommended for optimal texture. Store them airtight at room temperature for up to three days; the cold air tends to dry out the marshmallow binder.
How to add extra texture and flavor to the vanilla marshmallow base?
Brown the butter slightly before adding the marshmallows. Allowing the butter to foam and sizzle creates a toasted, nutty undertone that complements the dark cocoa flavor.
What is the proper way to chop the Oreo cookies for mixing?
Roughly chop the cookies into quarters or large shards. You want distinct chunks of cookie within the bar, not fine dust, for the best textural contrast.
No Bake Oreo Crispy Treats
Ingredients:
Instructions:
Nutrition Facts:
| Calories | 241 kcal |
|---|---|
| Protein | 1.8 g |
| Fat | 10.2 g |
| Carbs | 37.2 g |
| Fiber | 0.8 g |
| Sugar | 19.0 g |
| Sodium | 199 mg |
