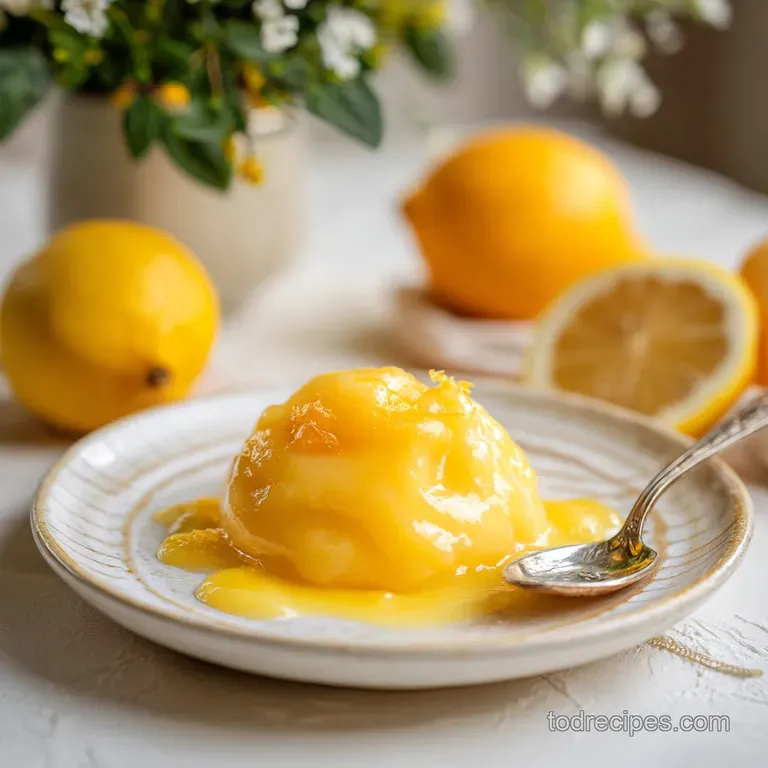
Homemade Lemon Curd: Creamy and Silky

- Time: Active 10 minutes, Passive 10 minutes, Total 20 minutes
- Flavor/Texture Hook: Zesty, silky, and tartly sweet
- Perfect for: Weekend brunch, cake fillings, or gifting
- Achieving Bright Tang in Lemon Curd
- Breaking Down the Timeline
- Selecting Your Fresh Ingredients
- Essential Non Reactive Tools
- Mastering the Whisking Technique
- Fixing Common Cooking Mistakes
- Creative Citrus Flavor Variations
- Storage and Preservation Tips
- Perfect Pairing Dessert Ideas
- Recipe FAQs
- 📝 Recipe Card
Achieving Bright Tang in Lemon Curd
The first time I tried to make a homemade lemon curd, I ended up with something that tasted more like a metallic penny than a bright dessert. I had used an old aluminum pan, and the reaction between the acid and the metal was a total disaster.
But when I finally got that first successful batch right, the aroma of fresh zest hitting warm sugar filled my kitchen like a burst of pure sunshine. It was a revelation to realize that something so decadent could come from such simple, humble ingredients.
You are going to love this version because it is remarkably forgiving and skips the fussy double boiler method that usually scares people off. We are going directly onto the heat, but with a few clever tricks to keep those eggs from scrambling.
The result is a texture that is so smooth it practically slides off the spoon, with a thickness that is sturdy enough for a tart but light enough to dollop onto a warm scone.
We are focusing on getting that perfect balance where your mouth puckers just a little bit before the sweetness and the butter wash over your palate. This is not the gloopy, cornstarch laden stuff you find in a jar at the grocery store. This is real, vibrant, and deeply satisfying.
Trust me, once you see those tiny flecks of zest suspended in that glossy yellow cream, you will never go back to store-bought again.
Breaking Down the Timeline
Timing is everything when you are working with eggs and citrus. Because we are skipping the water bath, we need to be focused for the entire ten minutes of cooking. This is a short lived intensity that yields a massive reward.
I like to have all my ingredients measured out before I even turn on the burner because once that mixture starts to thicken, you cannot walk away to look for the salt or grate a lemon.
| Method | Time | Texture | Best For |
|---|---|---|---|
| Stovetop (Classic) | 10 minutes | Thick, rich, and spreadable | Cake fillings and tarts |
| Double Boiler | 25 minutes | Ultra delicate and light | Topping delicate meringues |
| Microwave (Quick) | 5 minutes | Slightly less stable | Immediate pancake topping |
This recipe is optimized for the stovetop method because it provides the best balance of speed and structural integrity. If you want a curd that can stand up inside a layer cake without oozing out the sides, the direct heat method combined with our specific cooling process is the way to go.
It gives the proteins in the eggs just enough heat to set firmly without becoming rubbery.
Before we move into the specifics of the ingredients, it is helpful to understand the flow of the process. You will spend about ten minutes prepping your citrus and whisking the base, followed by exactly ten minutes of rhythmic whisking over the heat. It is a meditative process that rewards patience and a steady hand.
Selecting Your Fresh Ingredients
When a recipe has only a handful of ingredients, every single one of them has to be top tier. I always tell my friends to skip the bottled lemon juice. It has a dull, preserved flavor that will ruin the brightness we are looking for.
You want heavy, firm lemons that feel a bit soft when you squeeze them; those are the ones hiding all the juice.
| Component | Science Role | Pro Secret |
|---|---|---|
| Granulated Sugar | Humectant and sweetener | Whisk into eggs first to protect proteins |
| Fresh Lemon Juice | Acid and flavor base | Use room temperature fruit for maximum yield |
| Large Whole Eggs | Structure and thickening | Use pasture raised for a deeper orange hue |
| Unsalted Butter | Emulsifier and mouthfeel | Keep it ice cold until the very last second |
The sugar here does more than just sweeten the pot. It actually acts as a physical barrier between the egg proteins, making it much harder for them to clump together and scramble. This is why we whisk the sugar and eggs together until they look pale and frothy before adding the acidic juice.
It is a protective layer that ensures your curd stays silky.
For the butter, I always reach for a high fat European style if I have it on hand, but standard unsalted butter works beautifully too. The salt in this recipe is just a pinch, but do not skip it.
It functions like a volume knob, turning up the intensity of the lemon and the richness of the butter so they don't just taste one dimensional.
Essential Non Reactive Tools
Equipment choice is where most people go wrong with citrus heavy recipes. Because lemons are so acidic, they will pick up metallic flavors from aluminum or unlined copper pans. I learned this the hard way, as I mentioned, and now I strictly use stainless steel or enamel coated cast iron.
A silicone coated whisk is also a great choice because it gets into the corners of the pan without making that high pitched scratching sound.
- Heavy Bottomed Stainless Steel Saucepan: This provides even heat distribution, which is vital for preventing hot spots that could cook your eggs too quickly.
- Fine Mesh Sieve: Even the most careful cook might have a tiny bit of overcooked egg or a stray lemon seed. Straining is the difference between a good curd and a professional one.
- Microplane Zester: You want only the yellow part of the skin, not the bitter white pith. A sharp zester makes this effortless.
- Glass Storage Jars: Glass is non reactive and allows you to see that beautiful color while it sets in the fridge.
Chef Tip: If you find your lemons are a bit hard, roll them firmly against the counter with the palm of your hand for 15 seconds. This breaks the internal membranes and makes juicing them ten times easier.
If you are planning to use this for a bigger project, like as a layer in my Ina Garten Coconut Cake, make sure your sieve is big enough to handle the full volume of the batch in one go. You want to strain it while it is still hot and fluid for the smoothest possible finish.
Mastering the Whisking Technique
- Zest and prep. Grate 1 tablespoon (6g) of lemon zest and squeeze 3/4 cup (180ml) of fresh juice. Note: Do this first so you aren't rushing later.
- Combine the base. In your saucepan, whisk 1 cup (200g) granulated sugar with 3 large eggs and 1 egg yolk. Whisk until the mixture is pale and slightly frothy.
- Add the liquids. Pour in the fresh lemon juice and a pinch of fine sea salt. Note: The mixture will look quite thin at this stage.
- Apply gentle heat. Place the pan over medium low heat. Watch for the first signs of steam.
- Whisk constantly. Use a rhythmic motion for 8–10 minutes, making sure to scrape the "shoulders" of the pan where the mixture likes to hide.
- Test for doneness. Continue cooking until the curd thickens enough to coat the back of a spoon. A finger drawn through the coating should leave a clear path.
- Remove and emulsify. Take the pan off the heat. Whisk in the cold, cubed butter one piece at a time.
- Final strain. Immediately pour the hot curd through a fine mesh sieve into a glass bowl. Remove any bits of zest or cooked egg.
- Cover and cool. Press a piece of plastic wrap directly onto the surface of the curd to prevent a skin from forming.
- Chill thoroughly. Let it sit in the fridge for at least 4 hours to fully set its structure.
Fixing Common Cooking Mistakes
Even with the best intentions, things can go sideways in the kitchen. One of the most common issues is the "scrambled egg" effect. This usually happens because the heat was too high or the whisking wasn't constant enough. If you see little white flecks appearing, don't panic.
As long as the whole batch hasn't turned into an omelet, the sieve will usually save your reputation.
Why Your Curd Is Lumpy
If you notice the texture is grainy or has small lumps, it is likely that the egg proteins bonded too tightly before the sugar could intervene. This often happens if the eggs were cold when they hit the pan. Using room temperature eggs allows them to incorporate more smoothly into the sugar and juice.
| Problem | Root Cause | Solution |
|---|---|---|
| Metallic Aftertaste | Reacted with aluminum pan | Use stainless steel or glass tools next time |
| Curd Won't Thicken | Undercooked or too much juice | Continue whisking over low heat for 2-3 more mins |
| Greasy Texture | Butter added too hot/fast | Whisk cold butter in slowly off the heat |
Another common mistake is stopping too early. The curd will look significantly thicker once it is cold, but it needs to reach a certain viscosity on the stove first. If it feels like warm milk rather than a light gravy, it needs another minute or two.
The "nappe" test where you coat a spoon and draw a line through it is the gold standard for knowing when to pull it off the burner.
Common Mistakes Checklist
- ✓ Never use bottled juice; the preservatives affect the set and flavor.
- ✓ Whisk the sugar and eggs together before adding the acid.
- ✓ Keep the heat at medium low; patience prevents scrambled eggs.
- ✓ Add butter off the heat to ensure it emulsifies rather than melts into oil.
- ✓ Strain the mixture while hot; once it cools, straining is nearly impossible.
Creative Citrus Flavor Variations
Once you have mastered the basic lemon version, the world of citrus is your oyster. You can apply this exact same method to limes, grapefruits, or even blood oranges for a stunning pink hue. I once made a lime curd for a tropical themed party, and it was the star of the show when paired with coconut shavings.
If you find yourself needing a smaller amount, a small batch lemon curd recipe can be achieved by simply halving all the ingredients. However, I usually find that people want more, not less! If you are scaling up for a large gathering, remember that the cooking time will increase because there is more mass to heat up.
| Original Ingredient | Substitute | Why It Works |
|---|---|---|
| Lemon Juice | Key Lime Juice | Higher acidity and a floral, punchy tropical flavor |
| Granulated Sugar | Honey (use 3/4 cup) | Adds floral notes. Note: Will result in a softer set |
| Unsalted Butter | Coconut Oil (refined) | Good for dairy-free needs. Note: Use solid oil |
This silky curd makes a wonderful topping for a Lemon Delight recipe. It adds that hit of acidity that cuts right through the creamy layers. If you want a more "grown up" version, you can whisk in a teaspoon of minced fresh thyme or basil at the very end of the process. The herbal notes play incredibly well against the sharp lemon.
Storage and Preservation Tips
Storing your curd correctly is the secret to keeping that fresh, zesty flavor. Because of the high egg and butter content, this is a perishable item that needs to stay cold. I always recommend using glass jars with tight fitting lids.
Plastic can sometimes absorb odors from the fridge, and nobody wants lemon curd that tastes like last night's onions.
In the fridge, your homemade lemon curd storage life is typically about one week. Beyond that, the brightness of the lemon starts to fade, and the butter can take on a slightly stale flavor. If you know you won't use it all in seven days, the freezer is your best friend.
Lemon curd freezes surprisingly well because the high sugar and fat content prevent it from turning into a solid block of ice.
To freeze, leave about an inch of headspace in a freezer safe jar. It will stay good for up to three months. When you are ready to use it, let it thaw overnight in the refrigerator. Give it a good whisk once it is thawed to bring back that glossy emulsion, as the cold can sometimes make the butter look a bit matte.
If you have leftover egg whites from that extra yolk, don't throw them away! Store them in a small container and use them for a healthy omelet or a batch of meringues.
Perfect Pairing Dessert Ideas
The versatility of this spread is honestly unmatched. While it is iconic on a piece of toasted brioche, it can do so much more. One of my favorite ways to use it is as a "surprise" center for cupcakes. Just use a small knife to core out the middle of a baked cupcake and spoon in a bit of chilled curd before frosting.
If you are looking for a simple lemon curd tart filling, this recipe is exactly what you need. Simply pour the warm, strained curd directly into a pre baked tart shell and let it set in the fridge. It creates a professional looking dessert with minimal effort.
For a sophisticated brunch, try folding a few tablespoons of the curd into whipped cream. It creates a "lemon fool" that is light, airy, and incredibly refreshing.
- The Ultimate Dessert: Layer it between vanilla sponge cake with fresh raspberries.
- Sophisticated Brunch: Serve alongside ricotta pancakes or sourdough French toast.
- The Afternoon Snack: Use it as a dip for shortbread cookies or ginger snaps.
Regardless of how you serve it, the key is the contrast. The sharp, clean flavor of the lemon thrives when it is paired with something rich, like cream, or something crunchy, like a buttery crust. It is a recipe that feels like a hug and a wake up call all at once. Now, go grab those lemons and get whisking!

Recipe FAQs
What are common mistakes when making lemon curd?
Overheating or failing to whisk constantly are the biggest errors. If you don't whisk continuously for the full 8 10 minutes over medium low heat, you risk scrambling the eggs or creating a lumpy texture rather than a smooth, thick curd.
How do you make your own lemon curd?
Whisk the sugar, zest, eggs, and yolk in a non-reactive saucepan until pale and frothy. Stir in the lemon juice and salt, cook over medium low heat for 8 10 minutes until it coats the back of a spoon, then gradually whisk in the cold, cubed butter and strain through a fine mesh sieve.
Is lemon pie filling and lemon curd the same?
No, they are quite different. Lemon curd relies on a higher ratio of eggs and butter for a rich, emulsified texture, whereas pie filling often uses cornstarch or other thickeners to achieve a gelatinous consistency.
How long does homemade lemon curd last in the fridge?
It stays fresh for about one week when stored in a sealed glass jar. Keeping it in glass is essential to prevent the curd from absorbing other odors from your refrigerator.
Is it true I must cook the curd at high heat to make it thicken faster?
No, this is a common misconception. High heat will quickly curdle the egg proteins, resulting in a grainy mixture rather than the smooth, glossy emulsion you achieve by maintaining medium low heat.
Can I swap the butter for another fat to change the texture?
No, you should strictly use the cold, unsalted butter specified. If you enjoyed mastering the stable emulsion technique required to incorporate butter into this curd, you can apply that same precision to other delicate dessert toppings.
Why is my lemon curd not glossy?
You likely stopped whisking before the butter was fully emulsified. Ensure you whisk in the cold, cubed butter one piece at a time until the mixture is fully combined and smooth before removing it from the heat.
Homemade Lemon Curd

Ingredients:
Instructions:
Nutrition Facts:
| Calories | 80 calories |
|---|---|
| Protein | 1g |
| Fat | 4.7g |
| Carbs | 9g |
| Fiber | 0.1g |
| Sugar | 8.8g |
| Sodium | 17mg |
