Focaccia Bread Recipe: Shatter Crisp Crust
- Time: Active 40 mins, Passive 24 hours 5 mins, Total 24 hours 45 mins
- Flavor/Texture Hook: Shatter crisp golden crust with a velvety, honeycomb interior
- Perfect for: Weekend baking projects, special dinner parties, or as a classic snack
- The Ultimate Focaccia Bread Recipe for Perfect Golden Bubbles
- Why This Fluffy Crumb Works
- Timing Your Perfect Golden Loaf
- The Simple Science of Ingredients
- Essential Tools for Flaky Crust
- Mastering the Dimple and Bake
- Fixing Common Bread Baking Disasters
- Garnish Strategy and Creative Twists
- Keeping That Shatter Crisp Texture
- Best Pairings for Fresh Bread
- High in Sodium
- Recipe FAQs
- 📝 Recipe Card
The Ultimate Focaccia Bread Recipe for Perfect Golden Bubbles
The sizzle of olive oil hitting a hot metal pan always brings me back to my Grandma's kitchen on Sunday mornings. I remember the first time I tried her secret focaccia bread recipe. The aroma of fresh rosemary and toasted garlic filled the house, making it impossible to stay in bed.
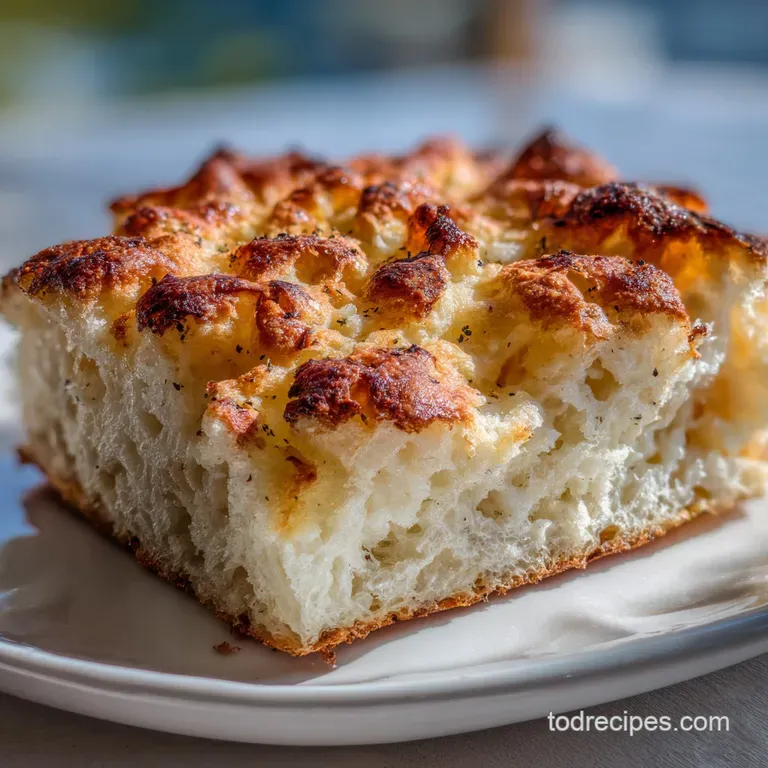
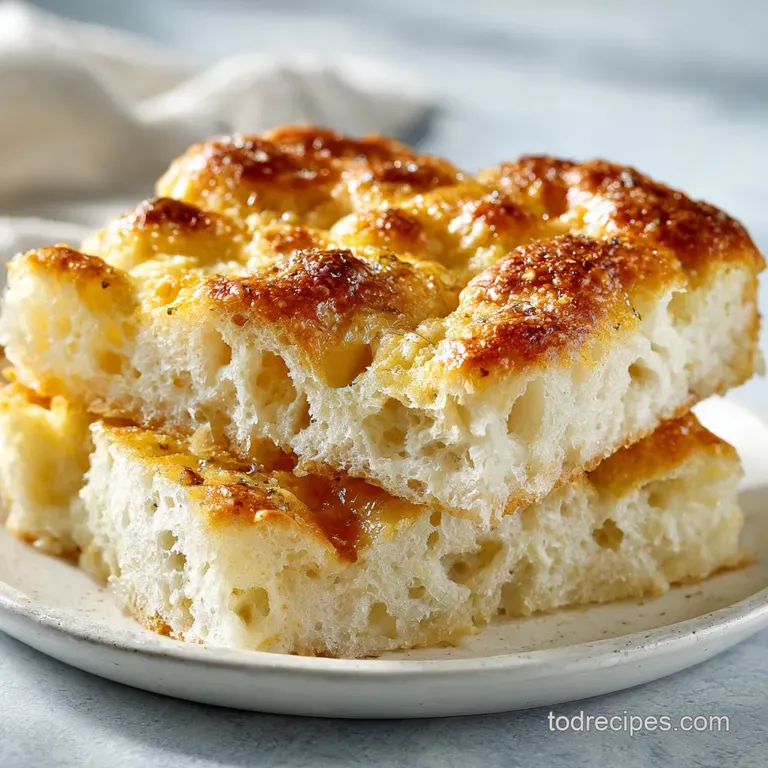
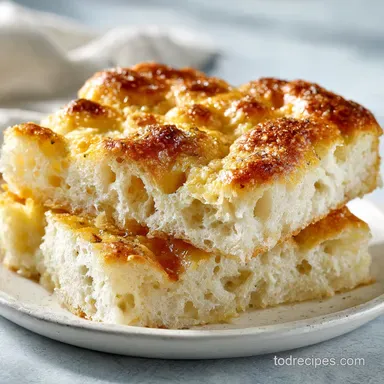
When I finally got a piece, the top had a literal shatter when my teeth hit it, while the inside was as velvety and light as a cloud. It was a classic treat that felt more like a gift than just a side dish.
For years, I struggled to recreate that specific texture. My loaves were either too dense, like a brick, or too oily without the crunch. I realized I was rushing the process and skipping the science that makes this bread iconic.
After dozens of failed attempts and sticky flour messes, I finally found the rhythm that works. This isn't just a bread recipe, it's a lesson in patience and moisture that results in the most beautiful, bubbly loaf you've ever seen.
We are going to walk through the exact steps to get those deep dimples and that golden amber glow. Whether you are serving this alongside a hearty soup or using it for the base of a legendary sandwich, the results will speak for themselves.
Trust me on this, once you see those massive bubbles forming under the surface of the dough, you'll be just as obsessed as I am. Let's get into the details of what makes this particular method so special.
Why This Fluffy Crumb Works
The success of this dough relies on three specific scientific pillars that transform basic pantry staples into a masterpiece. We aren't just mixing flour and water, we are managing a living ecosystem of yeast and gluten.
- High Hydration Levels: Using 430ml of water for 500g of flour creates an 86 percent hydration rate, allowing steam to expand the gluten cells into a wide, open honeycomb structure.
- Cold Fermentation: A 24 hour rest in the fridge slows down yeast activity, which allows enzymes to break down complex starches into simple sugars for a deeper, toasted flavor profile.
- The Brine Technique: Splashing a mixture of warm water and salt over the dough before baking prevents the crust from setting too quickly, allowing for maximum oven spring and a thinner, crispier skin.
| Method | Texture | Best For |
|---|---|---|
| Traditional Oven | Shatter crisp exterior, airy honeycomb crumb | Classic large loaves and sandwiches |
| Stovetop Skillet | Deep fried bottom, denser texture, fast | Small batches or quick individual snacks |
When you use the oven method, the consistent dry heat works with the olive oil to fry the bottom of the dough while the top stays moist. If you've ever tried a Sourdough Sandwich Bread recipe and loved the softness, you'll find the interior of this focaccia very similar, though the exterior is far more dramatic. The contrast between the oily, salty top and the pillowy middle is what makes this a staple in my home.
Timing Your Perfect Golden Loaf
This isn't a 30 minute project, but the hands on time is actually very minimal. Most of the magic happens while you're sleeping or at work. You need to hit specific numeric checkpoints to ensure the yeast is happy and the gluten is strong enough to hold those massive bubbles.
- Checkpoint 1: Ensure your water is exactly 35°C before mixing to activate the yeast without shocking it.
- Checkpoint 2: Perform exactly 4 sets of stretch and folds during the first 2 hours of room temperature proofing.
- Checkpoint 3: The dough must double in size during the pan proof phase, usually taking about 2 to 4 hours depending on your kitchen's temperature.
| Servings | Dough Weight | Pan Size | Bake Time |
|---|---|---|---|
| 6 People | 480g | 20x20 cm square | 20 minutes |
| 12 People | 960g | 22x33 cm rectangle | 25 minutes |
| 24 People | 1920g | Two large sheet pans | 30 minutes |
Scaling this recipe is quite simple as long as you maintain the ratios. For a large party, I always double the dough and use two separate pans to ensure the heat circulates properly. If you try to crowd too much dough into one small pan, you'll lose that signature height and end up with a soggy middle.
Stick to the 22x33 cm dimensions for the full recipe to get that classic thickness Grandma always aimed for.
The Simple Science of Ingredients
Every component in this focaccia bread recipe serves a structural purpose. We aren't just looking for flavor, we are looking for the physics of bread.
| Ingredient | Science Role | Pro Secret |
|---|---|---|
| Bread Flour | High protein (12-13%) | Use a brand with high gluten to trap large gas bubbles. |
| Warm Water | Hydration & Heat | Filtered water prevents chlorine from slowing down your yeast. |
| Instant Yeast | Carbon Dioxide Source | Store in the freezer to keep it potent for months. |
| Extra Virgin Olive Oil | Lipid Barrier & Flavor | high-quality oil lowers the smoke point for a better fry. |
The choice of flour is non negotiable here. All purpose flour just doesn't have the "backbone" to support the 86 percent hydration we are using. If you use a lower protein flour, your dough will turn into a puddle rather than a bouncy, elastic mass. For a different twist on textures, you might notice how flour behaves differently in a Maple Biscuits Recipe, where we want less gluten development, but here, we want as much as possible.
Dough Ingredient List
- 500g bread flour Why this? Provides high protein for structure
- 430ml warm water (35°C) Why this? High hydration for airy crumb
- 10g honey Why this? Feeds yeast and aids browning
- 7g instant yeast Why this? Reliable, fast acting rise
- 10g fine sea salt Why this? Tightens gluten and adds flavor
- 75ml extra virgin olive oil Why this? Creates the signature fried crust
Topping and Brine Mix
- 15g flaky sea salt Why this? Provides crunch and bursts of flavor
- 3 sprigs fresh rosemary Why this? Classic aromatic oil infusion
- 2 tbsp warm water (for brine) Why this? Keeps surface moist for bubbles
- 1 tsp fine sea salt (for brine) Why this? Seasons the surface evenly
Essential Tools for Flaky Crust
You don't need a fancy stand mixer for this, but the pan choice is vital. A heavy metal baking pan, like a 22x33 cm (9x13 inch) rimmed sheet pan, is the gold standard. Metal conducts heat much faster than glass or ceramic, which is essential for getting that bottom crust sizzle.
I also highly recommend using a digital scale. Measuring flour by the cup is a recipe for disaster because one cup can weigh 120g or 160g depending on how packed it is. In a recipe this wet, 40g of extra flour changes everything.
Chef Tip: Freeze your fresh rosemary sprigs for 5 minutes before stripping the leaves. This keeps them from drying out or burning too quickly in the high heat of the oven, keeping that vibrant green color.
You'll also want a large bowl that gives the dough plenty of room to expand. A bowl with a lid is better than using plastic wrap, as it prevents the dough from drying out during the long 24 hour ferment. If you have a bench scraper, it will make handling the sticky dough much easier during the stretch and fold phase.
Don't fear the stickiness, just embrace it and keep your hands slightly damp with water to prevent the dough from clinging to your fingers.
Mastering the Dimple and Bake
1. Initial Shaggy Mix
Whisk the flour and fine sea salt in a large bowl. In a separate jar, dissolve the honey and yeast into the 35°C water. Pour the liquid into the flour and stir with a spatula until no dry spots remain. Note: The dough will look very wet and messy, which is exactly what we want.
2. Stretch and Fold
Cover the bowl and let it rest for 30 minutes. With damp hands, grab the edge of the dough, pull it up, and fold it into the center. Rotate the bowl and repeat this 4 times. Perform this set every 30 minutes for a total of 2 hours.
The dough should look smoother and more elastic after each set.
3. Cold Fermentation Step
Drizzle 25ml of the olive oil into a clean, large bowl. Transfer the dough into the oiled bowl, turning it once to coat. Cover tightly and place in the fridge for 24 hours. Note: This long rest is where the complex, Grandma's style flavor is born.
4. Transfer and Pan Proof
Pour 25ml of olive oil into your 22x33 cm metal pan. Gently tip the cold dough into the pan. Do not force it to the corners yet. Cover with another pan or a large lid and let it sit at room temperature for 2 to 4 hours. It is ready when the dough jigglies like Jello and fills the pan.
5. Dimpling the Dough
Preheat your oven to 220°C (425°F). Drizzle the remaining olive oil over the top. Grease your fingers and press them straight down into the dough to create deep craters. Note: Reach all the way to the bottom of the pan to create those iconic oil filled pockets.
6. The Brine Application
Whisk the 2 tbsp water and 1 tsp salt for the brine until dissolved. Pour this brine all over the surface, making sure it settles into the dimples. Sprinkle with the rosemary leaves and the flaky sea salt. This creates the legendary shatter crisp texture.
7. High Heat Bake
Place the pan on the middle rack. Bake for 25 minutes. The top should be deep golden brown and the edges should look crispy and fried.
8. The Cooling Phase
Immediately remove the bread from the pan and place it on a wire rack. Note: If you leave it in the pan, the steam will make the bottom soggy, ruining that beautiful crunch.
Fixing Common Bread Baking Disasters
The biggest hurdle with this bread recipe is usually managing the moisture. If your dough doesn't seem to be rising, it’s often a temperature issue rather than a yeast issue. Most kitchens are colder than we realize, especially in the winter.
Dough Sticks to Pan
If your bread is fused to the metal, you likely didn't use enough oil or your pan isn't non stick. Always be generous with the olive oil on the bottom. It acts as a frying agent, not just a lubricant.
Flat and Dense Bread
This usually happens if the dough didn't proof long enough in the pan. The dough must be at room temperature and very bubbly before you dimple it. If it’s still cold from the fridge, the yeast won't produce enough gas during the bake.
Soggy Middle Texture
A soggy center is often caused by underbaking or letting the bread cool in the pan. Use an instant read thermometer to check the center; it should be 95°C.
| Problem | Root Cause | Solution |
|---|---|---|
| Large bubbles pop | Over proofing in the pan | Shorten the second rise by 30 minutes. |
| Bottom is pale | Not enough heat from below | Bake on the lowest rack or on a preheated pizza stone. |
| Rosemary is burnt | Leaves were too dry | Soak rosemary in oil for 10 minutes before topping. |
Common Mistakes Checklist:
- ✓ Never skip the cold ferment; it’s the secret to the velvety interior.
- ✓ Do not use a glass pan, as it won't give you the golden brown shatter on the bottom.
- ✓ Always use a digital scale to ensure your hydration doesn't drop below 80 percent.
- ✓ Be sure to dimple all the way to the bottom of the pan for the best texture.
- ✓ Let the bread cool on a wire rack for at least 20 minutes before slicing.
Garnish Strategy and Creative Twists
While the rosemary and sea salt version is a classic treat, you can use color and flavor accents to make this your own. My "Color Balance" strategy involves adding three specific accents to the top of the dough right before baking.
- Deep Green: Fresh rosemary or sage leaves. Add these just before the brine.
- Ruby Red: Sliced cherry tomatoes or sun dried tomatoes. These add a sweet acidity that cuts through the oil.
- Golden Amber: Thinly sliced garlic cloves that have been soaked in oil. These turn into crispy chips in the oven.
1. Garlic Bread Upgrade
Instead of just rosemary, mince 4 cloves of garlic and mix them with the final drizzle of olive oil. Spread this over the dough before dimpling so the garlic gets pushed into the craters. This creates a garlic focaccia bread that is far superior to any store-bought version.
2. Sourdough Focaccia Variation
If you have a sourdough starter, you can swap the instant yeast for 100g of active starter. You'll need to extend the room temperature proofing time to about 6 hours before the cold ferment. It adds a tangy complexity that pairs beautifully with the olive oil.
3. Visual Garden Focaccia
Use bell peppers, red onions, and chives to create a "garden" scene on top of your dough. This is a popular visual twist for parties. Just be careful not to use too many watery vegetables, or they will release moisture and make the top of the bread gummy.
Keeping That Shatter Crisp Texture
Focaccia is best eaten within 4 hours of leaving the oven. However, we all have leftovers sometimes. The key is to never, ever put this bread in the microwave. The microwave will turn that beautiful shatter crisp crust into a rubbery mess in seconds.
- Storage: Wrap leftovers in parchment paper and then foil. Keep at room temperature for up to 2 days. For longer storage, the fridge is okay for 4 days, but it will dry out the crumb.
- Freezing: Sliced focaccia freezes remarkably well. Wrap individual pieces tightly in plastic wrap and freeze for up to 3 months.
- Reheating: To restore the crunch, place the bread in a 180°C (350°F) oven for 5 to 8 minutes. If it was frozen, you don't even need to thaw it, just add 5 extra minutes to the bake time.
- Zero Waste: If your bread has gone completely stale, don't throw it out! Cut it into cubes, toss with a little more oil and salt, and bake until hard. These make the best croutons you've ever had for a Caesar salad.
Best Pairings for Fresh Bread
This bread is a meal in itself, but it shines when paired with the right dips and sides. Because it is so rich and oily, it needs something bright or creamy to balance the palate. One of my favorite ways to serve this is as a dipper for a Spinach Dip in recipe, where the cool creaminess of the dip meets the warm, salty crunch of the bread.
If you're serving this for dinner, it pairs perfectly with a simple balsamic and olive oil dipping bowl. For a more substantial meal, use large squares of the focaccia as the bread for a Mortadella and Burrata sandwich.
The airy holes in the bread catch the melting cheese and olive oil, making every bite a sensory experience.
Chef Note: If you have extra dough but don't want another loaf, you can fry small pieces of it in a pan like "pizzette" for a quick stovetop snack. It won't have the same height as the oven baked version, but it’s incredibly satisfying and hits that "classic fried dough" craving.
Whatever way you choose to serve it, remember that the best focaccia is shared. There’s something about breaking off a piece of warm, oily bread that brings people together. I hope this recipe becomes a new classic in your kitchen just like it did in mine!

High in Sodium
968 mg mg of sodium per serving (42% of daily value)
The American Heart Association recommends limiting sodium intake to 2,300mg per day for overall cardiovascular health.
Sodium Reduction Tips for Your Focaccia Recipe
-
Reduce Added Salt-25%
Carefully reduce the amount of fine sea salt in the dough from 10g to 7g. This adjustment can significantly lower the sodium content without drastically affecting the flavor.
-
Minimize Brine Sodium-20%
Reduce the fine sea salt in the brine from 1 tsp to 1/2 tsp, and mix it with a bit of olive oil and warm water, adding a rich depth to the focaccia. Since this brine is used to sprinkle the top of the bread, you can also choose to omit it entirely.
-
Less Flaky Salt-15%
Decrease the amount of flaky sea salt sprinkled on top of the focaccia after baking, or replace half of the amount with freshly cracked pepper. Reducing the amount can significantly reduce the sodium content.
-
Fresh Herbs
Enhance the flavor profile by increasing the amount of fresh rosemary or incorporating other fresh herbs like thyme or oregano. These herbs provide flavor without adding any sodium.
Recipe FAQs
What is the secret to making good focaccia?
Using high hydration and a long, cold fermentation. The high water content creates the large, open honeycomb structure, and the 24-hour cold proof develops deep flavor while strengthening the gluten network.
What makes focaccia bread different?
Focaccia is characterized by its high olive oil content and wet dough. This combination results in a bottom crust that essentially fries during baking, creating a signature shatter, unlike standard loaves.
Can I use all-purpose flour for focaccia?
No, use bread flour for best results. All-purpose flour lacks the necessary protein content to trap the high volume of gas produced by the wet dough, often leading to a flat or dense outcome.
How difficult is focaccia bread?
It requires patience, but the hands-on time is low. The difficulty lies mostly in timing the long rest periods and resisting the urge to add more flour when the dough feels too sticky.
How do I achieve the signature dimples and salty crunch?
Dimple deeply with oiled fingers right down to the pan base before baking. Then, pour a salt water brine over the surface just before it enters the oven to ensure the surface stays moist enough for maximum rise and a salty, crisp skin.
Is it true that I must use a metal pan for the best crust?
Yes, a rimmed metal sheet pan is crucial for that shatter. Metal conducts heat rapidly, which is necessary to quickly fry the dough bottom, yielding that crispy contrast against the soft interior. If you enjoyed mastering the control of dough texture here, the same focus on pan material is key in our Buttered Pecan Ice recipe for texture control.
What is the best way to reheat day-old focaccia to bring back the crunch?
Bake it uncovered in a hot oven. Place the slices directly on the oven rack at 180°C (350°F) for 5 to 8 minutes until the exterior feels crisp again. Never use a microwave, as it ruins the texture.
Best Focaccia Bread Recipe
Ingredients:
Instructions:
Nutrition Facts:
| Calories | 207 calories |
|---|---|
| Protein | 5.5 g |
| Fat | 6.4 g |
| Carbs | 31.4 g |
| Fiber | 1.1 g |
| Sugar | 0.9 g |
| Sodium | 968 mg |
