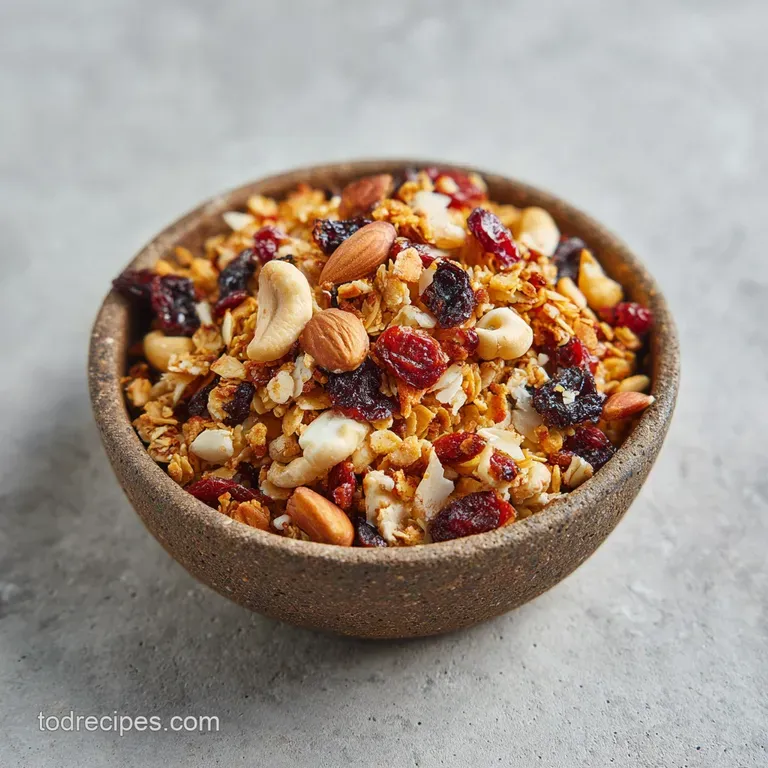
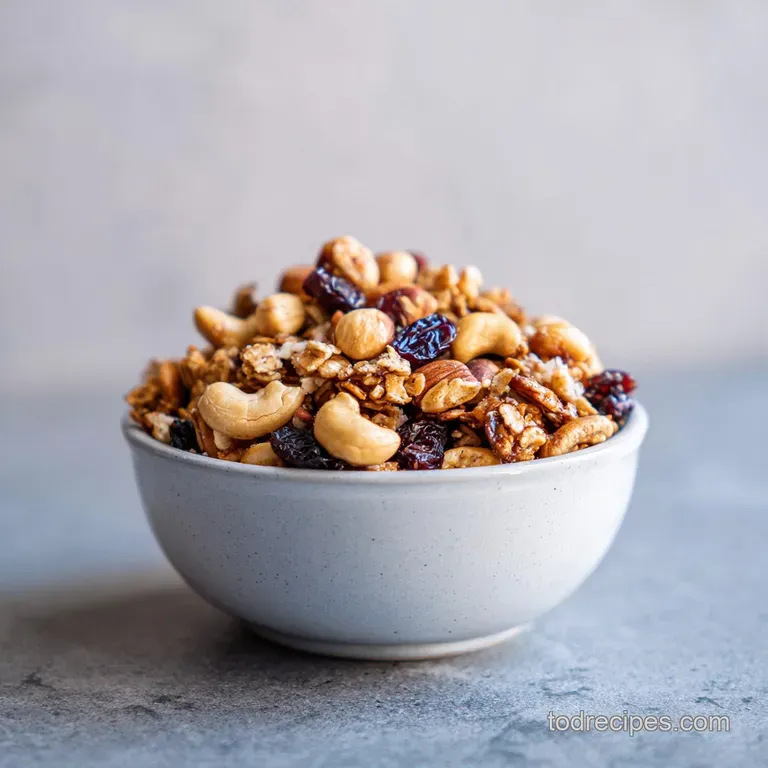
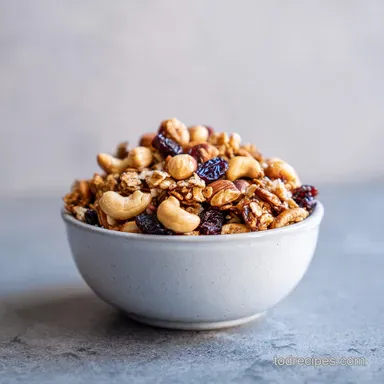
Summer Camping Snack with Granola and Nuts
- Time: Active 15 minutes, Passive 25 minutes, Total 40 minutes
- Flavor/Texture Hook: Shatter crisp nuts with a chewy, tart cherry finish
- Perfect for: High altitude trail snacks or beach day party bites
- Why This Honey Bound Crunch Defies the Humidity
- Decoding the Essentials of Your Trailside Component Deep Dive
- Selecting the Finest Elements for a High Energy Mix
- The Mixology Arsenal for Your Kitchen Adventure
- Executing the Multi Stage Flavor Build for Peak Crunch
- Fixing Common Texture Mistakes for a Flawless Bar
- Multiplying the Batch for Large Campground Celebrations
- Creative Flavor Profiles for Your Custom Adventure Mix
- Preserving the Crisp and Reducing Kitchen Scraps
- Elevating the Experience with Refreshing Trailside Beverages
- Exposing the Truth About Portable Energy Snacks
- Recipe FAQs
- 📝 Recipe Card
Why This Honey Bound Crunch Defies the Humidity
When you're out in the elements, the science of your snack matters more than you think. It's all about moisture migration and structural integrity.
- The Maillard Enhancement: Toasting the oats and nuts at 325°F (165°C) before mixing doesn't just add color; it physically changes the starch structure, making the oats less likely to absorb ambient humidity and turn soggy.
- Emulsified Stability: By simmering the honey, almond butter, and coconut oil together, you're creating a stable emulsion that acts like a culinary glue, ensuring the bars don't separate when the temperature climbs.
- Polysaccharide Bonding: The natural sugars in the honey, when heated, create long molecular chains that wrap around the fiber of the oats, providing a firm "snap" once cooled.
- Hygroscopic Balance: The sea salt doesn't just season; it helps manage the water activity in the dried cherries, keeping them plump while the rest of the bar stays intensely crunchy.
| Servings | Ingredient Adjustments | Pan Size | Prep Time |
|---|---|---|---|
| 6 People | Use 1.5 cups oats, 0.25 cup honey | 9x5 Loaf Pan | 15 minutes |
| 12 People | Follow recipe exactly | 8x8 Square Pan | 15 minutes |
| 24 People | Double all quantities | Large Baking Sheet | 20 minutes |
Finding the right balance of ingredients is like mixing a perfect spicy margarita; you need the heat, the sweet, and the salt to play nice. This snack is no different. The pecans bring a buttery richness, while the almonds offer a clean, firm bite. If you're looking for another way to use those crunchy elements, you might love adding them to a candied walnut salad for your next pre trip dinner party.
Decoding the Essentials of Your Trailside Component Deep Dive
We need to treat these ingredients with respect. Each one plays a specific role in the "mixology" of the bar, from the structural foundation to the flavor highlights.
| Ingredient | Science Role | Pro Secret |
|---|---|---|
| Old-fashioned Oats | Structural Base | Toast until they smell like popcorn to unlock maximum nuttiness. |
| Creamy Almond Butter | Primary Emulsifier | Use a "drippy" natural version so it blends seamlessly with the honey. |
| Dried Tart Cherries | Acidic Counterpoint | Soak in warm water for 2 mins then pat dry if they feel too tough. |
| Raw Pecans | Lipid/Fat Content | Rough chop by hand to keep large, "shattery" chunks in every bite. |
The interaction between the raw nuts and the heat is where the magic happens. By starting with raw pecans and almonds, we allow their natural oils to release during the initial toast. This coats the oats in a thin layer of healthy fats, creating a moisture barrier that keeps the honey from making things gummy.
Selecting the Finest Elements for a High Energy Mix
To get that vibrant, party ready flavor, you need high-quality components. Don't settle for the dusty bottom of-the bag oats. We want the good stuff.
- 3 cups Old-fashioned rolled oats: Why this? They provide the perfect surface area for the honey binder to cling to.
- Substitute: Quick oats (Note: result will be softer and less chewy).
- 1 cup Raw pecans, roughly chopped: Why this? High fat content provides a velvety mouthfeel and rich flavor.
- Substitute: Walnuts (Note: slightly more bitter but works well).
- 0.5 cup Raw almonds, slivered: Why this? Adds a distinct "snap" that stays consistent throughout the bar.
- Substitute: Chopped cashews (Note: creates a creamier, softer texture).
- 0.25 cup Raw pumpkin seeds (pepitas): Why this? Provides a pop of color and earthy zinc rich notes.
- Substitute: Sunflower seeds (Note: smaller seeds distribute more evenly).
- 0.5 cup honey: Why this? The ultimate natural glue with complex floral notes.
- Substitute: Brown rice syrup (Note: less sweet but very sticky).
- 0.5 cup creamy almond butter: Why this? Acts as a bridge between the liquid honey and solid grains.
- Substitute: Peanut butter (Note: will significantly dominate the flavor profile).
- 2 tbsp virgin coconut oil: Why this? Melts easily but firms up solid at room temperature.
- Substitute: Unsalted butter (Note: not as stable in high summer heat).
- 1 tsp pure vanilla extract: Why this? Rounds out the sweetness and adds a "bakery" aroma.
- Substitute: Almond extract (Note: use only 1/4 tsp; it’s very strong).
- 0.5 tsp fine sea salt: Why this? Essential for cutting through the richness and highlighting the cherries.
- Substitute: Kosher salt (Note: use 1 tsp as grains are larger).
- 0.5 cup dried tart cherries: Why this? The "acid trip" for your tastebuds that balances the fat.
- Substitute: Dried cranberries (Note: sweeter and less complex than cherries).
- 0.25 cup shredded unsweetened coconut: Why this? Adds a subtle tropical vibe and extra fiber.
- Substitute: Extra oats or seeds if you aren't a fan of coconut.
| Original Ingredient | Substitute | Why It Works |
|---|---|---|
| Honey (0.5 cup) | Maple Syrup (0.5 cup) | Adds a woodsy flavor. Note: Must boil longer to reach same stickiness. |
| Almond Butter (0.5 cup) | Sunflower Butter (0.5 cup) | Great for nut free zones. Similar fat profile and texture. |
| Raw Pecans (1 cup) | Macadamia Nuts (1 cup) | Ultra rich and buttery. Note: Increases calorie density significantly. |
The Mixology Arsenal for Your Kitchen Adventure
You don't need a professional laboratory to make these, but a few specific tools will make the process feel like a breeze. Think of these as your bar tools for snack creation.
- Large rimmed baking sheet: Essential for toasting the dry base without losing seeds over the edge.
- Parchment paper: Don't skip this. It’s the difference between a clean bar and a sticky mess.
- Small saucepan: For "cocktailing" your liquid binder.
- Whisk: To ensure the almond butter and honey are fully integrated.
- Large mixing bowl: Give yourself room to toss the ingredients without smashing the delicate oats.
- 8x8 inch square pan: The perfect size for creating that thick, satisfying bar height.
- Offset spatula: My favorite tool for applying even pressure across the surface.
Executing the Multi Stage Flavor Build for Peak Crunch
- Preheat your oven to 325°F (165°C) and line a large rimmed baking sheet with parchment paper. Note: This low temp prevents the nuts from scorching while they develop flavor.
- Spread the oats, pecans, almonds, and pumpkin seeds in an even layer on the baking sheet.
- Toast for 10–12 minutes, stirring halfway through, until the oats are mahogany colored and fragrant.
- While the dry base toasts, combine the honey, almond butter, and coconut oil in a small saucepan over medium low heat.
- Whisk constantly until the mixture is smooth and bubbles slightly at the edges. Note: This gentle simmer ensures the coconut oil and honey are perfectly emulsified.
- Remove the saucepan from heat and stir in the vanilla extract and fine sea salt.
- In a large mixing bowl, combine the toasted oat mixture with the dried cherries and shredded coconut.
- Pour the warm liquid binder over the dry ingredients and toss until thoroughly coated and glistening.
- Transfer the mixture back to the parchment lined pan or an 8x8 inch dish.
- Use an offset spatula to press the mixture down firmly into a tight, even layer. until the surface is flat and compressed. Note: This pressure is the "secret handshake" that prevents crumbling.
- Allow the granola to cool completely at room temperature for at least 2 hours, or refrigerate for 30 minutes to set the coconut oil before slicing into 12 bars.
Fixing Common Texture Mistakes for a Flawless Bar
Even the best of us hit a snag sometimes. If your bars are behaving badly, it usually comes down to temperature or pressure.
Why Your Granola Bars are Falling Apart
If your bars crumble the moment you touch them, you likely didn't press them hard enough or the binder didn't reach the right temperature. The honey and nut butter need to be warm enough to flow into every nook and cranny but thick enough to act as mortar.
Use a heavy bottomed glass to press the mixture into the pan if your hands aren't strong enough.
Why Your Snack is Too Sticky for the Trail
This usually happens if the coconut oil didn't fully integrate or if you didn't toast the oats long enough. Toasted oats are less absorbent, leaving the honey to stay on the surface as a glue. If they are too sticky, try popping them back in a low oven for 5 minutes to "set" the sugars, then re cool.
| Problem | Root Cause | Solution |
|---|---|---|
| Soft/Soggy Oats | Under toasting | Ensure oats smell nutty and look dark golden before mixing. |
| Oily Surface | Oil Separation | Whisk the honey and nut butter more vigorously during the simmer. |
| Burnt Aftertaste | Scorched Nuts | Check oven temp; pecans have high oil and can burn quickly above 325°F. |
Common Mistakes Checklist
- ✓ Never skip the parchment paper; honey is a permanent adhesive once it cools.
- ✓ Avoid using "old" nuts; the oils in pecans can turn rancid, ruining the flavor.
- ✓ Don't stir the mixture too much after adding the binder or you'll break the oats.
- ✓ Wait the full 2 hours for cooling; cutting too early results in a pile of granola rather than bars.
- ✓ Always use a sharp, non serrated knife for the cleanest slices.
Multiplying the Batch for Large Campground Celebrations
If you're heading out with a big crew, you'll need to scale up. These bars are a hit, so expect them to disappear fast.
- Scaling Up (2x or 3x): When doubling, use two separate baking sheets for toasting to ensure the oats don't steam. Keep the liquid to dry ratio exact, but you can be slightly more generous with the salt to keep the flavors "loud" in a larger batch.
- Scaling Down: If you only need a few bars, use a standard loaf pan. The depth will be perfect for a half batch, giving you that thick, chunky texture we love.
- Temperature Adjustments: If you're doubling the recipe in one large pan, you might need to increase the setting time by 15 minutes to ensure the center is completely firm before you try to slice.
Creative Flavor Profiles for Your Custom Adventure Mix
Once you've mastered the classic, it's time to get creative with your "Summer Camping Snack with Granola and Nuts". Think of this like a base cocktail that you can garnish in a thousand ways.
- The Tropical Trek: Swap the pecans for macadamias and add a handful of dried mango. It pairs brilliantly with the coconut. If you love these tropical vibes, you should check out my Peach and Blueberry Crisp which hits those same summer fruit notes.
- The Dark Forest: Use cocoa nibs instead of pumpkin seeds and swap cherries for dried raspberries. It's a decadent, "cheers"-worthy treat for a midnight campfire.
| Premium | Budget | Flavor Impact | Savings |
|---|---|---|---|
| Raw Pecans | Peanuts | More "classic" snack flavor | Save $4-6 |
| Pure Honey | Agave Nectar | Neutral sweetness, less floral | Save $2-3 |
| Almond Butter | Peanut Butter | Heavier, saltier profile | Save $3-5 |
Preserving the Crisp and Reducing Kitchen Scraps
Camping food needs to be resilient. Here is how to keep your snacks in peak condition.
- Storage: Keep these in an airtight container. In the fridge, they stay "velvety" and firm for up to 2 weeks. On the trail, keep them in a cool part of your pack. They can last 5-7 days at room temperature without losing their snap.
- Freezing: These freeze beautifully! Wrap individual bars in parchment and toss them in a freezer bag. They’ll last 3 months. Grab one as you leave the house; it’ll be perfectly thawed by your first trailhead break.
- Zero Waste: Don't throw away those little crumbs at the bottom of the pan after slicing. Save them! They make an incredible topping for yogurt or a fruit filled dessert. Even the leftover toasted oat dust can be stirred into a morning smoothie for extra nuttiness.
Elevating the Experience with Refreshing Trailside Beverages
What’s a party without a drink? This "Summer Camping Snack with Granola and Nuts" is designed to be paired.
Since we're focusing on that mixology vibe, think about balance. If you're enjoying these on a hot afternoon, a cold sparkling water with a squeeze of lime mimics the tartness of the cherries.
For a sunset moment, a spicy ginger mocktail provides a lovely heat that complements the cinnamon adjacent notes of the toasted pecans.
If you’re at home, these bars are the perfect sidekick to a strong espresso or even a light, fruity IPA. The hops in the beer play surprisingly well with the earthy pumpkin seeds and the sweet honey. Cheers to that!
Exposing the Truth About Portable Energy Snacks
There are a lot of myths out there about what makes a good trail snack. Let's set the record straight.
- Myth: Honey is just empty calories. Truth: Honey contains trace minerals and antioxidants that provide a more sustained energy release than refined sugar, preventing that dreaded "sugar crash" halfway up the mountain.
- Myth: You have to bake granola for hours to get it crunchy. Truth: It’s all about the initial toast of the dry ingredients. Once the oats are "shattered" by heat, the binder just needs to set. Total cook time is only 25 minutes.
- Myth: Fat in snacks makes you sluggish. Truth: Healthy fats from almonds and pecans are essential for long duration activities, providing long burning fuel that keeps you satiated and focused.
By understanding how these elements work together, you're not just making a snack; you're mastering a piece of culinary engineering. This Summer Camping Snack with Granola and Nuts is the result of layering flavors, respecting the chemistry of the binder, and never settling for a boring bite.
Now, get out there and enjoy the view!

Recipe FAQs
What are easy snacks to bring camping?
Granola bars are ideal because they are shelf stable and high energy. Preparing them at home allows you to control the quality of ingredients, ensuring you have a portable, nutrient dense bite that won't spoil in your pack.
What snacks can you make with granola?
Transform loose granola into firm bars by using an almond butter and honey binder. If you enjoyed mastering the emulsification technique used to stabilize the honey and nut butter glaze here, you can apply that same whisking method to create balanced dressings or sauces for other meals.
Is granola good for backpacking?
Yes, it is excellent for backpacking. The combination of oats, pecans, almonds, and pumpkin seeds provides a dense source of carbohydrates and fats, which are essential for maintaining energy levels on the trail.
What are good foods to eat while camping?
Focus on foods that are calorie dense and resistant to spoilage. These granola bars pair perfectly with dried fruits and nuts, as they provide a satisfying texture and reliable nutrition without requiring refrigeration.
How to get the perfect crunch in these granola bars?
Toast the dry oats and nuts at 325°F for 10 12 minutes. Stirring halfway through ensures they reach an even, mahogany color, which prevents the bars from turning soggy when exposed to moisture.
Is it true I must keep these in the fridge to keep them from falling apart?
No, this is a common misconception. While you can refrigerate them for 30 minutes to initially set the coconut oil, they will remain firm at room temperature if you press them into the pan with an offset spatula to create a tight, compact structure.
How to ensure the bars hold their shape after slicing?
Press the mixture firmly into an 8x8 inch dish using an offset spatula. Applying consistent pressure is key to creating the necessary density for the bars to maintain their structure once cooled for 2 hours.
Summer Camping Granola Bars
Ingredients:
Instructions:
Nutrition Facts:
| Calories | 344 kcal |
|---|---|
| Protein | 7.7 g |
| Fat | 20.9 g |
| Carbs | 35.4 g |
| Fiber | 4.8 g |
| Sugar | 15.8 g |
| Sodium | 92 mg |
